Painting Cabinetry and Built-Ins: Tips, Tricks, and Color Ideas
 by michael daigle
Summary
So you've decided it's finally time to freshen up your kitchen cabinets with a new coat of paint. Great idea! Painting your cabinetry and built-ins is one of the easiest ways to transform the look of your space without breaking the bank. Before you dive in with your brush or roller, there are a few steps you should know to ensure a professional-looking result. Below, we’ll walk you through preparation, priming, painting, and finishing—plus some color inspiration. With patience and the right technique, you’ll be enjoying your refreshed cabinets in no time.
Prepping Cabinets and Built-Ins for Painting
Proper preparation is key to a long-lasting finish. Start by cleaning every surface thoroughly to remove grease, grime, and dust. A degreaser like TSP substitute works well. Scrub doors, drawers, and cabinet frames both inside and out.
Next, repair any imperfections. Fill holes, dents, or cracks with wood filler or spackle, let dry, then sand smooth. Wipe away dust with a tack cloth.
Lightly sand all cabinet surfaces to create texture for the paint to adhere to. Once sanded, wipe everything down again.
Hardware
Remove all knobs, pulls, and hinges before painting. Label or number each piece of hardware and door/drawer to make reassembly easier. If you’re changing hardware, fill unused holes and sand smooth.
Taping
Protect areas you don’t want painted by using painter’s tape on countertops, appliances, trim, outlets, and vents. Remove the tape while the paint is still slightly wet for crisp, clean edges.
With careful prep, your cabinets will be ready for primer and paint, setting the stage for a smooth, durable finish.
Choosing the Right Paint for Cabinetry Painting Projects
The paint you choose will make a big difference in durability and finish. Here are the most common options:
Oil-Based Paint
Oil-based paints deliver a tough, durable finish with excellent coverage. However, they have strong fumes, require solvent cleanup, and dry slowly. If using oil-based paint, work in a well-ventilated space and allow plenty of curing time before reattaching doors and hardware.
Latex or Acrylic Paint
Modern latex and acrylic paints are low-VOC, quick-drying, and easy to clean up with soap and water. Many cabinet-specific formulas now provide superior adhesion and a smooth finish. They’re an excellent eco-friendly option.
Chalk Paint
Chalk paint provides full coverage in 1–2 coats and adheres well without primer. It dries to a soft matte finish that can be distressed for a rustic effect. In busy kitchens, add a protective topcoat for extra durability.
Stain-Blocking Primer
Always apply 2–3 coats of a high-quality stain-blocking primer before painting. This prevents stains or wood tannins from bleeding through and creates an even base for your chosen paint.
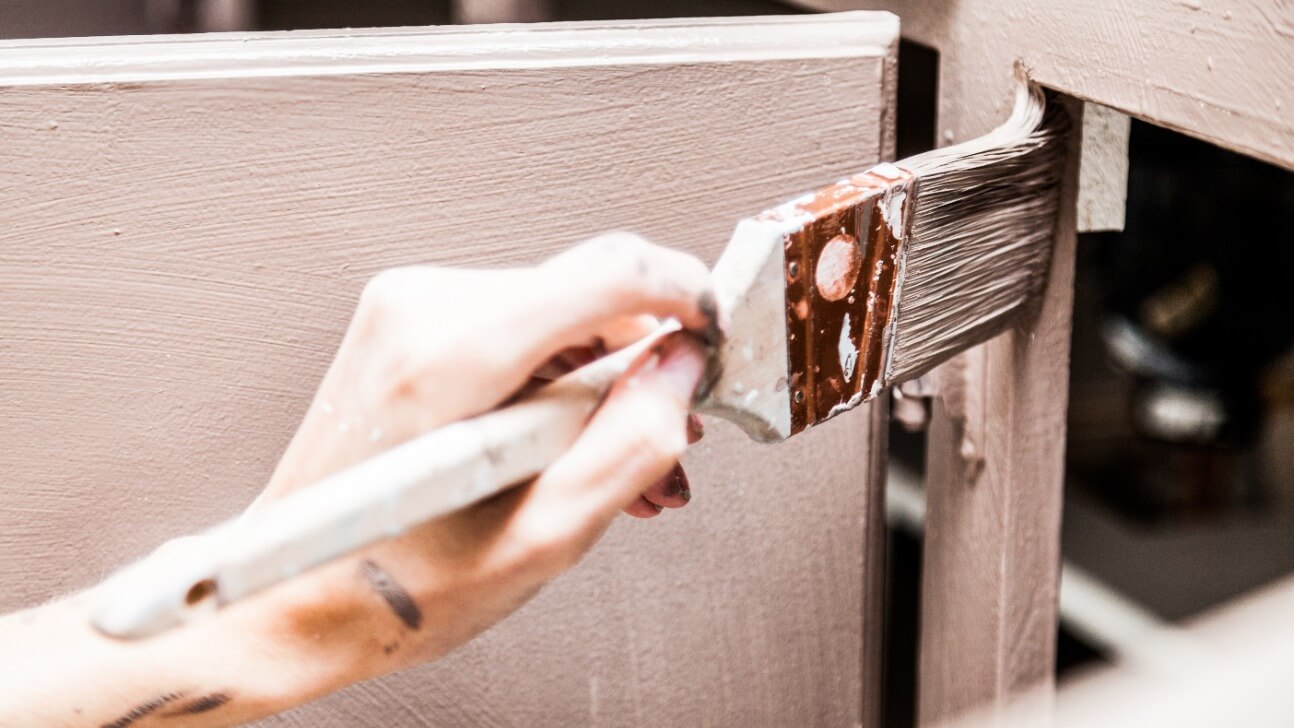
Brush vs Roller – Which Is Best for Painting Cabinets?
Brushes and rollers both have advantages. The best choice depends on the look you want and your level of experience.
Brushes
Brushes are perfect for edges, trim, and details. Angled sash or tapered brushes provide control and precision. While brushing takes longer, it produces a very smooth finish when done correctly.
Rollers
Rollers quickly cover large, flat surfaces such as cabinet doors. Foam or microfiber rollers designed for cabinets minimize texture and streaks. However, rollers alone may leave a subtle texture, so most projects require a mix of both tools.
For the best results, use rollers on wide surfaces and brushes for corners and edges. Apply multiple thin coats, sanding lightly between each for a flawless finish.
Painting Cabinetry – Techniques for a Smooth Finish
A smooth, professional finish requires patience and proper technique. Follow these steps for best results:
Prep
Clean, sand, and dust your cabinets thoroughly so the primer and paint adhere properly.
Primer
Apply a primer formulated for wood or laminate cabinetry. This creates a uniform base and boosts paint adhesion.
Paint
Choose a cabinet-grade paint with a satin or semi-gloss finish for durability. Apply at least two thin coats using a high-quality angled brush for edges and a roller for large panels. Always paint in the same direction with smooth, even strokes.
Distressing (Optional)
For a rustic or farmhouse feel, distress painted cabinets after they dry by gently sanding edges, corners, and handles. Remove dust before sealing.
Sealer
Protect your finish with two coats of polyurethane or acrylic sealer. Let each coat dry fully before applying the next. This final step makes the surface more resistant to stains, scratches, and moisture.
With the right prep and technique, your kitchen cabinets will look fresh and polished for years to come.
Painting Inside Cabinets and Drawers
Don’t overlook cabinet and drawer interiors. A fresh coat of paint inside elevates the overall look and creates a custom, high-end feel.
Clean and Lightly Sand
Wipe down interiors to remove dust and grime, then lightly sand chipped or worn spots. Vacuum debris with a brush attachment.
Apply Primer
Use a primer designed for woodwork or cabinetry, and allow it to dry completely before painting.
Paint the Inside Edges
With a small angled brush, paint corners and edges first. Apply at least two coats, letting each coat dry fully.
Paint Large, Flat Areas
Use a roller for flat surfaces and a brush for edges. Apply multiple coats until the finish is smooth and opaque.
Protect While Drying
To avoid drips or splatters, use painter’s tape along outer edges. Remove carefully once the paint is dry.
Add a Clear Topcoat (Optional)
For extra protection in high-use cabinets, add a clear polyurethane or acrylic topcoat. This shields paint from scratches and wear.
Painting the interiors of your cabinets and drawers is a budget-friendly way to make your kitchen feel custom and complete.
Ideas for Painting Built-in Bookshelves and Entertainment Centers
When it comes to painting built-in bookshelves and entertainment centers, you have plenty of color directions. Think beyond basic white or wood tones—choose shades that complement your decor and make a confident statement.
Blues
Calming blues suit shelves filled with books, photos, and keepsakes. A deep navy or cobalt adds drama, while a light blue‑gray keeps things airy. For a coastal note, consider a sea‑glass or seafoam accent.
Greens
Earthy olive, sage, or forest green pairs beautifully with natural wood accents. For a bolder, jewel‑tone moment, emerald green brings luxurious depth.
Reds
For a high‑impact look, try bright cherry or rich burgundy. Prefer something subtler? Rust, maroon, or terra‑cotta delivers warmth without overwhelming the room.
Yellows
Cheerful yellows instantly brighten a space. Pale lemon or buttery yellow suits casual rooms; for farmhouse charm, mustard is a great pick.
• Tape off any areas you don't want to paint, such as interior edges or the back panels of shelves.
• Apply a quality primer—especially when covering wood grain or darker colors—and let it dry as directed.
• Cut in edges and corners with a brush, then roll 2 thin coats of paint, allowing 2–4 hours between coats.
• For an ultra‑smooth finish, lightly sand between coats and remove dust with a tack cloth.
• Add a clear protective topcoat (e.g., polyurethane) in high‑traffic or high‑use areas.
• Once everything is dry, restyle with books, baskets, art, and accessories.
With a little paint and elbow grease, built‑ins can become a colorful focal point. Pick a shade you love and let your style shine.
Creative Color Ideas for Painted Cabinetry and Built-Ins
When choosing cabinet colors, think beyond neutrals. Classics are timeless, but a bold, saturated hue can deliver instant personality.
- Red: From bright cherry to deep merlot, red makes a statement. Pair with white or light gray walls for crisp contrast.
- Navy blue: Sophisticated and cozy—great for coastal or classic looks. Brass hardware and natural wood accents complement it nicely.
- Forest green: Earthy and inviting. Keep walls light and airy so the room doesn’t feel closed in.
- Turquoise or teal: Playful and retro. Balance with warm wood floors and counters for a grounded feel.
- Yellow: From pale lemon to rich mustard, yellow brightens any room—especially those with ample natural light. Temper it with gray or white walls.
- Plum or eggplant: Deep and dramatic for a luxe vibe. Gold or brushed‑nickel hardware and marble counters keep the palette elegant.
Don’t feel limited to beige or white—choose a color that reflects your style and makes you smile.
Protecting Newly Painted Cabinets and Built-Ins
Fresh paint can feel dry within hours, but full cure often takes 2–4 weeks. During this period, treat surfaces gently to avoid dents, scratches, and sticking.
Keep doors and drawers open
Leave doors and drawers open for the first 3–5 days to promote airflow and off‑gassing of VOCs. This helps prevent sticking where painted surfaces meet.
Avoid heavy use
Avoid loading shelves with heavy items or slamming doors and drawers for at least a week so the coating can bond fully.
Use felt pads
Apply felt pads, sliders, or bumpers where surfaces contact to reduce friction and prevent scratches.
Protect from moisture
Keep interiors dry for 2–4 weeks. Wipe spills immediately and avoid storing damp items inside to prevent blistering or softening.
Re-coat as needed
Most cabinet systems need 2–3 coats. Follow your product’s instructions for recoat windows; second coats are often ready within 4–6 hours. Dark colors or bare wood may need an additional pass.
Handle with care now, and you’ll enjoy a durable, long‑lasting finish for years.
FAQ - Answering Common Questions on Painting Cabinetry and Built-Ins
Painting cabinetry is a rewarding project—and a few best practices go a long way. Here are answers to common questions.
What type of paint should I use?
Choose a paint formulated for cabinets, trim, or furniture—it offers superior adhesion and durability for high‑touch areas. Options include:
- Cabinet paint: Purpose‑built for cabinetry; smooth finish with fewer coats.
- Chalk paint: Matte, easily distressed; seal for durability.
- Latex or acrylic: Water‑based, fast‑drying; pair with primer for best results.
Do I need to prime the cabinets first?
Yes—primer promotes adhesion and blocks stains or tannins. Use a product designed for wood or laminate cabinetry.
How many coats of paint do I need?
Typically two to three thin coats yield an even, professional finish. Very dark colors or previously unfinished wood may require an extra coat.
Do I need to sand the cabinets first?
Lightly scuff‑sand with ~220‑grit in the direction of the grain to give the surface “tooth.” Wipe clean with a tack cloth. For laminate, sanding is especially important.
Can I paint cabinet hardware or should I remove it?
Removing hardware is best for a clean result. If you must paint with hardware in place, carefully mask it with painter’s tape and remove the tape once the paint is dry to the touch.
Final Thoughts
Painting cabinetry and built‑ins can completely refresh a room at a fraction of the cost of replacement. With thoughtful prep, smart color choices, and patient technique, you’ll create a polished, custom look you’ll love. Happy painting!