How to Paint Metal Furniture: Outdoor and Indoor Guide
 by michael daigle
Summary
Painting metal furniture transforms tired pieces into statement items by applying proper surface preparation, rust-inhibiting primers, and weather-resistant paints that protect against moisture and UV damage. Whether refreshing outdoor seating or updating office storage, success requires understanding metal's unique challenges—smooth surfaces that resist adhesion, temperature-induced expansion and contraction, and constant environmental assault. This comprehensive guide walks you through every step from assessment to maintenance, ensuring professional results that last 5-7 years or more.
Key Takeaways
- Proper surface preparation including cleaning, rust removal, and priming determines 80% of your final finish quality
- Outdoor furniture requires oil-based or specialized exterior acrylic paints with UV inhibitors and rust protection
- Spray painting provides the smoothest finish on metal furniture but requires proper ventilation and technique
- Apply 2-3 thin coats with 2-4 hours drying time between coats rather than one thick application
- Intricate details and ornamental pieces require specialized small brushes or foam applicators for complete coverage
- Clear topcoat sealers extend paint life by 3-5 years on outdoor furniture exposed to weather elements
Assessing Your Metal Furniture: What Can Be Painted
Nearly all metal furniture can be painted successfully, but understanding your piece's material and condition determines your approach. Steel, aluminum, wrought iron, and cast iron furniture all accept paint differently based on their surface properties and existing finishes. Before investing time and materials, examine your furniture carefully to identify potential challenges and select appropriate products.
Identifying Metal Types and Characteristics
Start by identifying the metal type. Steel and wrought iron are magnetic and prone to rust, requiring rust-inhibiting primers. Aluminum is lightweight, non-magnetic, and rust-resistant but needs special etching primers for paint adhesion. Cast iron feels heavy and rough-textured, accepting paint readily but requiring thorough rust treatment if oxidation exists. Most outdoor furniture uses powder-coated steel or aluminum, while vintage pieces often feature bare metal or old paint layers.
Evaluating Existing Finish Condition
Check the existing finish condition. Powder-coated furniture with intact coating needs only cleaning and light scuffing before painting. Peeling, chipping, or bubbling finishes must be removed completely—partial removal creates an uneven surface that telegraphs through new paint. Run your hand across surfaces to feel for rust pitting, which appears as rough, flaky areas. Surface rust (orange-brown discoloration) can be sanded away, but deep pitting may require filling with automotive body filler before painting.
| Metal Type | Identification | Paint Compatibility | Special Considerations |
|---|---|---|---|
| Steel | Magnetic, medium weight | ✅ Excellent with primer | Requires rust-inhibiting primer |
| Aluminum | Non-magnetic, lightweight | ✅ Good with etching primer | Needs special bonding primer |
| Wrought Iron | Magnetic, heavy, decorative | ✅ Excellent | Clean intricate details thoroughly |
| Cast Iron | Very heavy, rough texture | ✅ Excellent | May need extensive rust removal |
| Powder-Coated | Smooth, uniform finish | ✅ Good after scuffing | Must roughen surface for adhesion |
Special Considerations for Complex Pieces
Inspect joints, crevices, and undersides where moisture collects. These areas often harbor hidden rust that spreads under new paint if not addressed. Wicker-and-metal combinations require masking the wicker portions or removing them if possible. Furniture with moving parts like folding chairs needs special attention—avoid painting hinges, screws, and pivot points that must remain functional.
⚠️ Common Mistake
Don't paint over chrome or brass plating without removing it first. Paint doesn't adhere well to these ultra-smooth surfaces, and the plating eventually flakes, taking your paint with it. Either strip the plating chemically or embrace the mixed-material look by masking plated areas.
Best Paint for Indoor Metal Furniture
The best paint for indoor metal furniture is acrylic enamel or oil-based enamel, which provides durability for high-contact surfaces while offering low odor and easy cleanup. Indoor metal furniture faces less environmental stress than outdoor pieces, allowing broader paint choices that prioritize appearance and quick drying. However, furniture receiving heavy use—office chairs, kitchen tables, filing cabinets—still requires durable finishes that resist chipping and scratching.
Acrylic Latex Paints for Indoor Use
Acrylic latex paints formulated for metal provide the best balance of durability and convenience for most indoor furniture projects. These water-based paints dry within 1-2 hours between coats, emit minimal odors, and clean up with soap and water. Look for products labeled as metal paint or all-surface paint with built-in primer. Premium acrylic enamels create harder finishes than standard latex, making them ideal for high-contact surfaces like desk legs and cabinet doors.
Oil-Based Enamels for Durability
Oil-based enamels deliver the hardest, most durable finish for indoor metal furniture but require longer drying times (6-8 hours between coats) and better ventilation. These paints self-level beautifully, minimizing brush marks and creating glass-smooth surfaces on flat panels. Use oil-based paints for furniture that will be handled frequently or cleaned regularly, such as metal bed frames, shelving units, and decorative tables. The extended working time also makes oil-based products easier to apply on large, flat surfaces without visible lap marks.
| Paint Type | Dry Time | Durability | Best For | Cost Range |
|---|---|---|---|---|
| Acrylic Latex | 1-2 hours | Good | Decorative pieces, light-use furniture | $15-25/quart |
| Acrylic Enamel | 2-4 hours | Very Good | Office furniture, shelving, tables | $20-35/quart |
| Oil-Based Enamel | 6-8 hours | Excellent | High-use furniture, cabinets | $25-40/quart |
| Spray Paint (Acrylic) | 30-60 minutes | Good | Small pieces, intricate details | $5-8/can |
| Spray Paint (Oil-Based) | 2-4 hours | Very Good | Professional-looking finishes | $7-12/can |
Spray Paints and Finish Sheen Selection
Spray paints offer convenience for small indoor furniture pieces and items with intricate details. Modern spray formulations include built-in primers and provide excellent coverage in thin, even coats. Choose spray paints specifically designed for metal rather than general-purpose products. For comprehensive guidance on spray techniques, see our spray painting metal guide.
Finish sheen affects both appearance and practicality. Flat and matte finishes hide surface imperfections but show fingerprints and are harder to clean. Satin and semi-gloss finishes strike the best balance for most furniture, offering subtle sheen that's easy to wipe clean while not showing every minor scratch. High-gloss finishes create dramatic, modern looks but require perfect surface preparation and highlight any flaws.
✓ Recommended Products
- Rust-Oleum Universal All Surface Paint - Water-based formula with built-in primer, excellent adhesion to metal, available in 32 colors
- Benjamin Moore Advance Interior Paint - Premium acrylic with alkyd-like durability, self-levels beautifully, ideal for cabinets and tables
- Krylon Dual Superbond Spray Paint - Bonds without primer on most metals, dries in 10 minutes, perfect for small decorative pieces
Best Paint for Outdoor Metal Furniture (Weather-Resistant)
The best paint for outdoor metal furniture is direct-to-metal (DTM) paint or oil-based exterior enamel with UV inhibitors and rust protection, lasting 5-7 years in harsh conditions. Outdoor metal furniture endures extreme conditions that quickly destroy paints designed for interior use. Temperature swings cause metal expansion and contraction, moisture promotes rust formation, and UV radiation breaks down paint binders causing fading and chalking.
The best outdoor metal furniture paints include:
- Direct-to-metal (DTM) paints with built-in rust inhibitors
- Oil-based exterior enamels with UV protection
- Premium exterior acrylics formulated for metal
- Automotive-grade paints for maximum durability
- Rust-inhibiting primers as foundation layers
Direct-to-Metal (DTM) Paints
Direct-to-metal (DTM) paints represent the gold standard for outdoor metal furniture. These industrial-grade coatings combine primer and topcoat in one product, creating chemical bonds with metal surfaces that resist peeling and flaking. DTM paints contain rust inhibitors that prevent oxidation even if moisture penetrates to the metal surface. Look for products specifically labeled for exterior metal use with UV protection. While more expensive than standard paints ($35-50 per quart), DTM coatings provide 5-7 years of protection versus 2-3 years for conventional products.
Oil-Based and Acrylic Exterior Options
Oil-based exterior enamels offer proven durability for outdoor furniture at moderate cost. These paints penetrate metal surfaces deeply, creating strong mechanical bonds that withstand moisture and temperature changes. The oil-based formula naturally resists water absorption better than latex products, making it ideal for furniture that stays outdoors year-round. However, oil-based paints require mineral spirits for cleanup, emit strong odors during application, and take 24-48 hours to cure fully between coats.
High-performance acrylic exterior paints formulated for metal provide a water-based alternative with impressive durability. These specialized acrylics contain higher resin content than standard latex paints, creating tougher films that flex with temperature changes. They also include mildewcides that prevent fungal growth in humid climates. While not quite matching oil-based durability, premium exterior acrylics offer 80-90% of the performance with easier application and cleanup.
| Paint Type | Weather Resistance | UV Protection | Rust Prevention | Lifespan |
|---|---|---|---|---|
| DTM Paint | ✅ Excellent | ✅ Excellent | ✅ Excellent | 5-7 years |
| Oil-Based Exterior Enamel | ✅ Excellent | ✅ Very Good | ✅ Very Good | 4-6 years |
| Premium Exterior Acrylic | ✅ Very Good | ✅ Very Good | ✅ Good | 3-5 years |
| Standard Exterior Latex | ⚠️ Fair | ⚠️ Fair | ⚠️ Fair | 2-3 years |
| Automotive Paint | ✅ Excellent | ✅ Excellent | ✅ Excellent | 7-10 years |
Color Selection and Heat Considerations
Color selection impacts paint longevity outdoors. Dark colors absorb more heat, causing greater expansion and contraction that stresses paint films. Black and dark brown furniture can reach surface temperatures of 150-170°F in direct sun, accelerating paint breakdown. Light colors—whites, tans, light grays—reflect heat and typically last 1-2 years longer than dark shades. If you prefer dark colors, choose paints with heat-reflective pigments that minimize temperature buildup.
Primer Requirements for Outdoor Furniture
Always use a rust-inhibiting metal primer before topcoating outdoor furniture, even with DTM paints. While DTM products claim to work without primers, adding a dedicated rust-inhibiting primer layer extends paint life by 2-3 years and provides insurance against rust breakthrough. Primers designed for rusty metal contain phosphoric acid or zinc compounds that chemically convert rust and prevent further oxidation.
💡 Pro Tip
Apply an extra coat of paint to furniture legs, feet, and any areas that contact ground surfaces. These high-moisture zones experience accelerated paint breakdown. The additional coat thickness provides extra protection where you need it most, often doubling the lifespan in these vulnerable areas.
Preparing Metal Furniture for Painting
Proper metal furniture preparation involves cleaning with degreaser, removing rust with sandpaper or wire brush, sanding to roughen the surface, and applying rust-inhibiting primer before painting. Surface preparation determines 80% of your final paint quality and longevity. Paint bonds only as well as the surface beneath it—applying beautiful coats over dirt, rust, or flaking old paint guarantees failure within months.
To prepare metal furniture for painting, follow these steps:
- Clean thoroughly with TSP solution and stiff brush
- Rinse completely and allow 24 hours to dry
- Remove loose paint and rust with wire brush
- Sand entire surface with 120-150 grit sandpaper
- Wipe away all dust with tack cloth
- Apply rust-inhibiting primer in 2 thin coats
- Allow primer to dry 2-4 hours before topcoating
Cleaning and Degreasing Metal Surfaces
Begin with thorough cleaning using a degreasing cleaner. Mix 1/4 cup of trisodium phosphate (TSP) per gallon of warm water, or use a TSP substitute if environmental regulations restrict TSP in your area. Scrub all surfaces with a stiff nylon brush, paying special attention to joints, crevices, and undersides where dirt accumulates. Rinse thoroughly with clean water and allow the furniture to dry completely—24 hours in humid conditions. Grease or oil residue prevents paint adhesion, so don't skip this step even if furniture looks clean.
Rust Removal Techniques
Address rust before painting. Light surface rust (orange-brown discoloration without pitting) can be removed with 80-120 grit sandpaper or a wire brush. Sand until you reach bright metal, then wipe away dust with a tack cloth. Moderate rust with shallow pitting requires more aggressive treatment—use a wire wheel on an electric drill to remove loose rust, then treat with a rust converter product that chemically transforms remaining rust into a stable, paintable surface. Deep rust with holes or structural damage needs repair with automotive body filler or replacement of affected sections.
| Step | Action | Time Required | Tools Needed |
|---|---|---|---|
| 1 | Clean with TSP solution, scrub thoroughly | 15-30 minutes | Bucket, stiff brush, TSP |
| 2 | Rinse completely and allow to dry | 24 hours | Hose or clean water |
| 3 | Remove loose paint and rust | 30-90 minutes | Wire brush, sandpaper, scraper |
| 4 | Sand entire surface with 120-150 grit | 20-45 minutes | Sandpaper or sanding sponge |
| 5 | Wipe with tack cloth to remove dust | 5 minutes | Tack cloth or damp rag |
| 6 | Apply rust-inhibiting primer | 15-30 minutes | Brush or sprayer, primer |
| 7 | Allow primer to dry per label | 2-4 hours | None |
Evaluating and Removing Old Paint
Evaluate existing paint carefully. If old paint adheres firmly with no peeling or bubbling, you can paint over it after cleaning and light sanding. However, powder-coated finishes and glossy paints must be scuffed with 150-220 grit sandpaper to create tooth for new paint. Sand until the surface feels slightly rough to the touch—you're not removing the old finish, just dulling its surface. This mechanical abrasion provides the texture new paint needs to grip properly.
For furniture with multiple paint layers or severe peeling, complete paint removal provides the best foundation. Chemical paint strippers work well on intricate pieces where sanding is difficult, but require careful application and thorough neutralization before painting. For simpler pieces, use a wire wheel on a drill or an angle grinder with a paint-stripping disc. Work outdoors or in a well-ventilated area and wear a respirator—old paint may contain lead or other hazardous materials.
Applying Primer for Optimal Adhesion
Apply rust-inhibiting primer to all bare metal areas. Primer creates a uniform surface for topcoats and provides critical rust protection. Use spray primer for intricate details and brush-on primer for large, flat surfaces. Apply thin, even coats rather than one thick application—heavy primer runs and sags, creating defects that telegraph through topcoats. Allow primer to dry according to label directions before topcoating, typically 2-4 hours for most products.
🚨 Safety First
Always test old paint for lead before sanding or stripping furniture manufactured before 1978. Lead test kits cost $10-15 at hardware stores and provide results in minutes. If lead is present, use chemical strippers rather than sanding to minimize dust, work outdoors, and dispose of debris according to local hazardous waste regulations.
Brush vs. Spray Painting Metal Furniture
The application method you choose dramatically affects both the process and final appearance of painted metal furniture. Brushing and spraying each offer distinct advantages and limitations that make them better suited for different furniture types, project scales, and skill levels. Understanding these differences helps you select the right approach for your specific project and achieve professional-looking results with the tools you have available.
Advantages of Spray Painting
Spray painting delivers the smoothest, most professional finish on metal furniture. The atomized paint particles lay down in thin, even layers that self-level as they dry, eliminating brush marks and creating factory-like results. Spray application excels on furniture with intricate details, curves, and hard-to-reach areas where brushes can't access easily. You'll complete projects faster—a piece that takes 2 hours to brush-paint might take only 30 minutes to spray. However, spray painting requires more setup, creates overspray that necessitates masking and drop cloths, and demands good ventilation or outdoor workspace.
Advantages of Brush Painting
Brush painting offers better control, requires minimal setup, and works well indoors with standard ventilation. Brushes excel on large, flat surfaces like cabinet doors and table tops where you can work paint into the surface and create smooth, uniform coverage. You'll waste less paint compared to spraying, and cleanup involves only washing brushes rather than dealing with spray equipment. The main drawback is visible brush marks, especially with fast-drying paints. Achieving smooth results requires quality brushes, proper technique, and often more coats than spraying.
| Factor | Spray Painting | Brush Painting |
|---|---|---|
| Finish Quality | ✅ Smooth, factory-like appearance | ⚠️ Visible brush marks possible |
| Application Speed | ✅ Very fast (30-60 minutes) | ⚠️ Slower (1-3 hours) |
| Detail Work | ✅ Excellent for intricate areas | ⚠️ Challenging in tight spaces |
| Setup Required | ⚠️ Extensive masking and protection | ✅ Minimal setup needed |
| Paint Waste | ⚠️ 20-40% overspray loss | ✅ Minimal waste |
| Ventilation Needs | ⚠️ Requires outdoor space or spray booth | ✅ Standard room ventilation sufficient |
| Skill Level | ⚠️ Requires technique practice | ✅ Easier for beginners |
| Cost | ⚠️ Higher (spray equipment or cans) | ✅ Lower (brushes only) |
Application Techniques and Best Practices
Combination approaches often yield the best results. Spray-paint intricate details, spindles, and ornamental elements where brushes struggle, then brush larger flat surfaces like seats and table tops. This hybrid method provides smooth coverage in difficult areas while giving you the control and efficiency of brushing on simple surfaces. You'll minimize overspray while still achieving professional results throughout the piece.
For brush painting, invest in quality synthetic brushes designed for the paint type you're using. A 2-inch angled sash brush works well for most furniture projects, providing good control and coverage. Apply paint in thin coats using long, smooth strokes in one direction. Avoid overworking the paint—once you've laid down a coat, leave it alone rather than continually brushing over it. Multiple thin coats always produce better results than one thick application.
When spray painting, maintain consistent distance and speed. Hold the can or spray gun 8-12 inches from the surface and move in steady, overlapping passes. Start each pass before the furniture edge and continue past it—stopping and starting on the piece itself creates heavy spots and runs. Apply 2-3 light coats rather than trying to achieve full coverage in one pass. For detailed techniques on spray painting metal surfaces, our comprehensive guide covers equipment selection, technique refinement, and troubleshooting common issues.
💡 Pro Tip
Test your chosen application method on a hidden area first—underneath a chair seat or inside a cabinet door. This reveals how the paint flows, dries, and looks on your specific furniture, allowing technique adjustments before tackling visible surfaces. Different metals and existing finishes affect paint behavior, making test areas invaluable for avoiding costly mistakes.
How to Paint Metal Chairs and Tables
To paint metal chairs and tables, disassemble removable parts, position pieces for optimal access, apply paint systematically from bottom to top, and allow 48-72 hours curing time before use. Chairs and tables present unique painting challenges due to their combination of horizontal and vertical surfaces, functional requirements, and high-contact areas that demand durable finishes.
Follow these steps to paint metal chairs and tables:
- Remove cushions, seats, and detachable components
- Position furniture upside-down to paint legs first
- Apply primer to all surfaces in thin coats
- Paint legs, stretchers, and supports systematically
- Flip furniture and paint seat frames and backs
- Apply 2-3 topcoats with 2-4 hours between coats
- Allow 48-72 hours curing before use
- Apply extra coats to high-wear areas
Disassembly and Positioning
Start by disassembling removable components. Take off cushions, seats, and any detachable parts that shouldn't be painted or are easier to paint separately. For chairs with removable seats, paint the frames and seats separately to avoid paint buildup where they connect. Mark hardware locations with masking tape labels so you can reassemble correctly. Place small screws and bolts in labeled plastic bags to prevent loss during the multi-day painting process.
Position furniture for optimal access to all surfaces. For chairs, work with them upside-down first to paint legs and undercarriage, then flip right-side-up for backs and arms. This sequence prevents drips from falling onto freshly painted areas. Tables should be painted top-down—legs and aprons first, then the top surface last. Elevate pieces on sawhorses or blocks so you can access undersides without stooping, reducing fatigue during extended painting sessions.
Systematic Paint Application Sequence
Apply paint systematically to avoid missed spots. For chairs, follow this sequence: legs (starting from bottom), stretchers and cross-supports, seat frame, arms, and back. Work from bottom to top and inside to outside, ensuring complete coverage before moving to the next section. On tables, paint all four legs completely, then move to aprons and supports, finishing with the top surface. This methodical approach prevents the common mistake of discovering unpainted areas after everything else has dried.
| Surface Type | Painting Technique | Coats Needed | Drying Time |
|---|---|---|---|
| Chair Legs | Spray or brush vertically, rotate piece | 2-3 coats | 2-4 hours between |
| Chair Backs | Spray for spindles, brush for solid panels | 2-3 coats | 2-4 hours between |
| Table Tops | Brush with foam roller for smoothest finish | 3-4 coats | 4-6 hours between |
| Table Legs | Spray for uniform coverage | 2-3 coats | 2-4 hours between |
| Ornamental Details | Small brush or spray at close range | 2-3 coats | 1-2 hours between |
Special Techniques for Table Tops
Table tops require special attention for smooth, durable finishes. After priming, lightly sand with 220-grit paper between coats to remove any dust particles or imperfections. For the final coat, use a high-quality foam roller to apply paint in thin, even layers. Roll in one direction, then cross-roll perpendicular to eliminate roller marks. A foam roller creates smoother finishes than brushes on large, flat surfaces while applying paint more evenly than spray methods.
Drying and High-Wear Protection
Allow extended drying time before use. While paint may feel dry to the touch within hours, full cure takes 3-7 days depending on the product. Chairs and tables experience significant stress from weight, movement, and contact, so rushing the curing process leads to scratches, imprints, and premature wear. Wait at least 48 hours before light use and a full week before placing heavy items on table tops or subjecting chairs to daily use.
Protect high-wear areas with additional coats. Chair arms, table edges, and leg bottoms receive disproportionate wear and contact. Apply an extra coat to these zones for added durability. Consider using a harder, more durable paint for these areas—even if you use acrylic for most surfaces, switching to oil-based enamel on high-contact points extends their lifespan significantly.
⚠️ Common Mistake
Don't paint furniture feet that rest directly on the ground without elevating them slightly. Paint on ground-contact surfaces wears through rapidly from friction and moisture. Instead, install furniture glides or felt pads after painting, or leave the bottom 1/4 inch of legs unpainted and apply these protective elements to bare metal.
How to Paint Metal Cabinets and Filing Cabinets
To paint metal cabinets, remove all hardware and doors, sand powder-coated surfaces with 150-180 grit sandpaper, paint components separately, and allow 72 hours curing before reassembly. Metal cabinets and filing cabinets present distinct challenges compared to furniture due to their large, flat surfaces, moving parts, and functional hardware that must continue operating smoothly after painting.
Follow these steps to paint metal cabinets:
- Remove all handles, pulls, locks, and hinges
- Take off doors and drawers for separate painting
- Sand powder-coated finish with 150-180 grit paper
- Clean thoroughly with denatured alcohol
- Paint cabinet interior first, then exterior
- Paint doors flat on sawhorses (backs first)
- Use foam roller on large flat surfaces
- Allow 72 hours curing before reassembly
Hardware Removal and Component Separation
Begin by removing all hardware including handles, pulls, locks, and hinges if possible. Cabinet doors and drawers should be removed and painted separately from the main cabinet body. This prevents paint buildup in gaps and ensures complete coverage of all surfaces. Label each piece with masking tape indicating its original location—cabinets often have slight variations that make reassembly confusing without clear marking. Store hardware in labeled containers organized by cabinet section.
Powder Coating Preparation
Address the powder-coated finish properly. Powder coating creates an extremely smooth, hard surface that resists paint adhesion. Sand all surfaces with 150-180 grit sandpaper until the glossy finish becomes uniformly dull. You're not removing the powder coating, just roughening it to provide mechanical grip for primer. Use a random orbital sander on large, flat surfaces and hand-sand details and edges. After sanding, clean thoroughly with denatured alcohol to remove sanding dust and any remaining oils or contaminants.
Painting Cabinet Components Separately
Paint cabinet bodies and doors separately using different orientations. For cabinet boxes, paint the interior first, then the exterior. This sequence prevents you from leaning against wet exterior paint while reaching into interiors. Remove drawers completely and paint them as separate units—fronts, sides, backs, and bottoms. Doors should be painted flat on sawhorses, starting with the back/interior side, allowing complete drying, then flipping to paint the front/exterior side.
| Component | Preparation | Application Method | Special Considerations |
|---|---|---|---|
| Cabinet Body | Sand, clean, mask interior if desired | Spray or roller for large surfaces | Paint interior first, then exterior |
| Doors | Remove hinges, sand both sides | Spray for smoothest finish | Paint backs first, flip when dry |
| Drawers | Remove completely, sand all sides | Spray fronts, brush sides/backs | Don't paint drawer glides/tracks |
| Hardware | Remove and clean separately | Spray paint or replace | Consider upgrading to new hardware |
| Interior Surfaces | Clean thoroughly, light sanding | Brush or spray | Optional—can leave original finish |
Protecting Functional Areas and Reassembly
Protect moving parts and functional areas. Never paint drawer slides, glide mechanisms, lock cylinders, or hinge mounting surfaces. Mask these areas with painter's tape before painting, or carefully brush around them. Paint buildup on drawer slides causes binding and difficulty opening drawers. If you accidentally paint these areas, scrape paint away before it fully cures using a putty knife or razor blade.
Use a foam roller for the smoothest finish on large, flat cabinet surfaces. After priming, apply paint with a 4-inch foam roller in thin, even coats. Roll vertically on sides and horizontally on tops, maintaining consistent pressure and overlapping each pass by 50%. Foam rollers eliminate brush marks and create uniform coverage that mimics the original powder-coated appearance. For a completely smooth finish, lightly sand between coats with 220-grit paper and wipe clean before applying the next coat.
Allow 72 hours of curing time before reassembly. Cabinet doors and drawers experience significant friction and stress during normal use. Rushing reassembly results in paint damage at contact points, scratches from hardware installation, and imprints from handles. Stack painted components horizontally with spacers between them for curing, ensuring air circulation around all surfaces. When reassembling, handle pieces carefully and tighten hardware gradually to avoid gouging fresh paint.
✓ Recommended Products
- Benjamin Moore Advance - Premium cabinet paint that self-levels beautifully, extremely hard finish, ideal for filing cabinets that receive heavy use
- Rust-Oleum Cabinet Transformations - Complete kit with bonding primer and durable topcoat, specifically formulated for metal cabinets
- Sherwin-Williams ProClassic - Oil-based enamel that creates furniture-quality finishes on metal, excellent for office furniture
How to Paint Intricate Metal Furniture Details
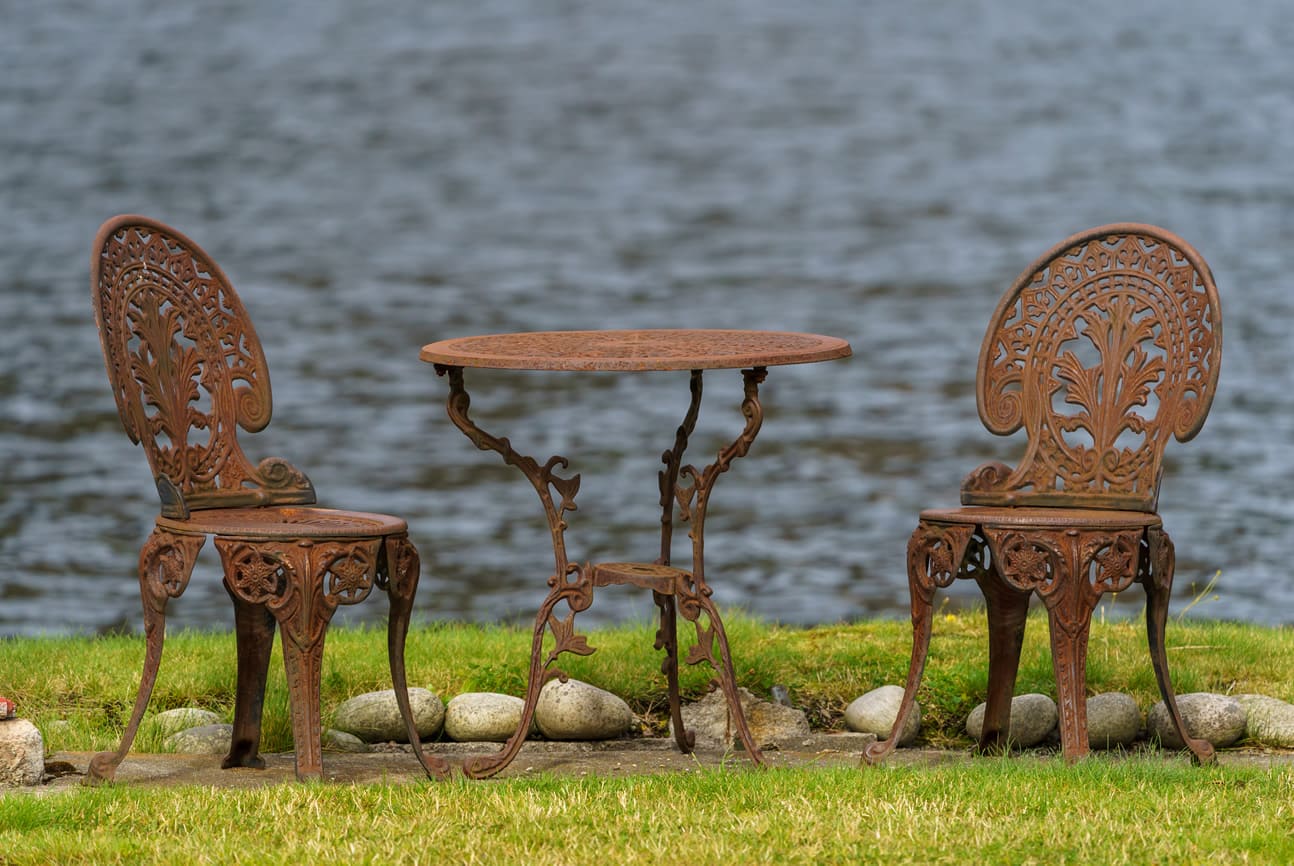
Ornamental metal furniture featuring scrollwork, spindles, perforated patterns, and decorative castings requires specialized techniques to achieve complete, even coverage in tight spaces where standard brushes and spray patterns struggle. These intricate details define the character of vintage wrought iron, cast aluminum patio sets, and decorative accent pieces, making proper painting crucial to their appearance. Success demands patience, the right tools, and systematic approaches that ensure no area gets missed.
Spray Techniques for Complex Geometries
Spray painting provides the most efficient coverage for intricate details, allowing paint to reach recessed areas and complex geometries that brushes can't access. Use multiple light coats from different angles rather than trying to achieve full coverage from one direction. Start with a straight-on pass, then spray from 45-degree angles on both sides, and finish with passes from above and below if the piece orientation allows. Rotate furniture between coats to access all sides without handling wet paint.
Specialized Brush Techniques
When brush-painting intricate areas, use specialized artist brushes and foam applicators. Small detail brushes (1/4 to 1/2 inch) with firm bristles reach into tight spaces between scrollwork and around ornamental elements. Foam brushes work well on perforated patterns and geometric details where bristle brushes leave marks. Apply paint by dabbing rather than stroking in confined areas—this stippling technique forces paint into recesses without creating drips or runs.
Address hard-to-reach areas systematically. Create a mental grid dividing the furniture into sections, then work through each section completely before moving to the next. This methodical approach prevents the common problem of missing spots that only become visible after the entire piece dries. Use a bright work light positioned at an angle to cast shadows that reveal unpainted areas while you're still working.
| Detail Type | Best Tool | Technique | Common Challenges |
|---|---|---|---|
| Scrollwork | Spray paint or small brush | Multiple angles, rotate piece | Missing undersides and backs |
| Spindles | Spray paint | Continuous rotation during spraying | Drips from over-application |
| Perforated Patterns | Foam brush or spray | Dab through holes from both sides | Paint bridging holes |
| Deep Crevices | Artist detail brush | Work paint in with brush tip | Insufficient penetration |
| Raised Castings | Small foam roller | Roll over raised areas, brush recesses | Paint pooling in low spots |
Preventing Paint Buildup and Maintaining Details
Prevent paint buildup in decorative recesses by applying thinner coats than on flat surfaces. Intricate areas naturally collect more paint as it flows into low spots, creating thick accumulations that run or sag. Use your brush or spray pattern to deposit minimal paint, then allow it to flow naturally into details. If paint begins pooling, immediately dab it with a dry foam brush to redistribute excess before it sets.
For furniture with extremely tight spaces or complex three-dimensional details, consider using an airbrush or detail spray gun. These tools provide finer control than standard spray cans, allowing precise paint placement without overspray in surrounding areas. While requiring more equipment investment, airbrushes excel on high-value antique pieces or furniture with museum-quality details where perfect coverage justifies the extra effort.
Clean out paint from holes and perforations before it dries. Perforated metal patterns can become clogged with paint, obscuring the design. While paint is still wet, use a toothpick, wire, or small drill bit to clear holes. For larger perforations, push a clean cloth through from the back to remove excess paint. This maintenance step takes only minutes but preserves the visual impact of perforated designs.
💡 Pro Tip
Photograph intricate furniture from multiple angles before painting, then reference these photos during paint application. Details that seem obvious when examining unpainted furniture become less visible once primer coats are applied. Photos serve as maps showing exactly where decorative elements are located, preventing missed spots that would otherwise require touch-ups after drying.
Protecting Painted Metal Furniture
Protect painted metal furniture by applying 2-3 coats of clear polyurethane sealer with UV inhibitors, cleaning monthly with mild soap, and storing seasonal pieces indoors during winter months. Even the highest-quality paint job requires ongoing protection to maintain its appearance and extend its lifespan, especially on outdoor furniture exposed to weather extremes. Protective measures range from simple maintenance routines to specialized coatings that shield paint from UV damage, moisture, and physical wear.
Essential protection methods for painted metal furniture include:
- Clear polyurethane topcoat with UV protection (2-3 coats)
- Monthly cleaning with mild soap and soft brush
- Immediate touch-up of chips and scratches
- Furniture covers for seasonal outdoor pieces
- Protective pads on legs and contact surfaces
- Indoor storage during harsh weather months
Clear Protective Topcoats
Apply a clear protective topcoat over painted furniture for maximum durability. Polyurethane, polycrylic, and specialized furniture sealers create transparent barrier layers that absorb UV radiation, repel moisture, and resist scratching. For outdoor furniture, use exterior-grade polyurethane with UV inhibitors—these products typically extend paint life by 3-5 years compared to unsealed paint. Apply 2-3 thin coats of sealer after paint has cured for 48-72 hours, sanding lightly between coats with 320-grit paper for optimal adhesion.
Choose sealer sheen carefully to complement your paint finish. Satin sealers work well over satin and semi-gloss paints, maintaining the original appearance while adding protection. Gloss sealers create dramatic, high-shine finishes but show scratches and imperfections more readily. Matte sealers provide protection without changing paint appearance but offer less moisture resistance than glossier options. Test sealers on inconspicuous areas first—some products slightly darken or yellow certain paint colors.
Maintenance and Storage Practices
Implement regular cleaning and maintenance schedules. Outdoor furniture should be washed monthly during use seasons with mild soap and water to remove dirt, pollen, and organic debris that promote mildew growth. Avoid pressure washers, which can damage paint—use a soft brush or cloth with garden hose pressure instead. Indoor furniture needs only occasional dusting and spot cleaning, but high-contact areas like chair arms and table edges benefit from monthly inspection for wear spots that need touch-up.
| Protection Method | Application | Lifespan Extension | Best For |
|---|---|---|---|
| Clear Polyurethane | 2-3 coats over cured paint | 3-5 years | Outdoor furniture, high-use items |
| Furniture Wax | Buff on thin layer, reapply quarterly | 1-2 years | Indoor decorative pieces |
| Automotive Clear Coat | 3-4 thin spray coats | 5-7 years | Show-quality furniture, harsh climates |
| Protective Covers | Place over furniture when not in use | 2-3x normal lifespan | Seasonal outdoor furniture |
| Furniture Pads | Apply to contact surfaces | Prevents specific wear areas | Chair legs, table feet |
Store seasonal outdoor furniture properly during off-seasons. Clean furniture thoroughly before storage, allowing it to dry completely—trapped moisture under covers promotes rust and paint deterioration. Store in dry, covered areas like sheds, garages, or basements rather than leaving pieces outside under tarps. If outdoor storage is necessary, elevate furniture on blocks to prevent ground contact and use breathable covers that allow moisture evaporation while blocking sun and rain.
Damage Repair and Recoating Schedule
Address paint damage immediately to prevent spread. Small chips and scratches expose bare metal that quickly rusts, especially outdoors. Keep touch-up paint on hand and repair damage as soon as you notice it. Clean the damaged area, sand lightly, apply primer if bare metal is exposed, then touch up with paint. Small repairs take only minutes but prevent rust from spreading under surrounding paint, which would eventually require extensive repainting.
Reapply protective coatings periodically based on furniture exposure. Outdoor furniture in full sun needs sealer renewal every 2-3 years, while covered porch pieces may last 4-5 years between applications. Indoor furniture rarely needs resealing unless it receives heavy use. Monitor furniture condition—when water stops beading on surfaces or paint shows dulling despite cleaning, it's time to reapply protective coatings.
✓ Recommended Products
- Minwax Helmsman Spar Urethane - Marine-grade clear finish with maximum UV protection, ideal for outdoor furniture in harsh climates
- General Finishes High Performance Top Coat - Water-based sealer that won't yellow, excellent for white and light-colored furniture
- Renaissance Wax - Museum-quality microcrystalline wax for indoor furniture, provides subtle sheen and protection
Metal Furniture Painting Project Gallery
Real-world project examples demonstrate how proper techniques transform tired metal furniture into stunning focal pieces. These before-and-after scenarios showcase different furniture types, paint selections, and finish styles while highlighting common challenges and their solutions. Learning from completed projects helps you visualize possibilities for your own furniture and anticipate issues specific to different piece types.
Vintage Wrought Iron Patio Set Restoration: A 1960s wrought iron table and four chairs showed extensive surface rust and peeling paint from decades of outdoor exposure. The restoration involved complete paint removal using a wire wheel, treatment of rust pits with naval jelly rust remover, and filling deep pits with automotive body filler. After priming with rust-inhibiting primer, the set received three coats of DTM oil-based enamel in glossy black. Clear polyurethane topcoat added UV protection. The project took 16 hours over 5 days but resulted in furniture that looks better than new and should last another 20 years with proper maintenance.
Mid-Century Office Furniture Update: Tan metal filing cabinets and a desk from the 1970s needed modernization without losing their retro charm. The powder-coated surfaces were sanded to dull the finish, then cleaned with TSP substitute. Two coats of bonding primer created a foundation for Benjamin Moore Advance paint in a sophisticated charcoal gray. Cabinet interiors were left original tan to reduce project scope. New brushed nickel hardware replaced dated brass pulls. The transformation took 12 hours including drying time, converting dated office furniture into stylish storage that complements contemporary décor.
Aluminum Bistro Set Color Change: A modern aluminum bistro set in boring beige needed personality for a colorful patio. The challenge was achieving good adhesion on the slick aluminum surface. After thorough cleaning and sanding with 180-grit paper, self-etching primer designed for aluminum created the bonding foundation. Three coats of exterior acrylic paint in vibrant turquoise transformed the set into an eye-catching focal point. The entire project took just 6 hours over 2 days, proving that even beginners can achieve dramatic results with proper preparation.
| Project Type | Time Investment | Difficulty Level | Key Success Factors |
|---|---|---|---|
| Rusty Outdoor Furniture | 12-20 hours | Advanced | Complete rust removal, quality primer, weather-resistant paint |
| Powder-Coated Cabinets | 8-15 hours | Intermediate | Thorough surface sanding, bonding primer, smooth application |
| Aluminum Furniture | 6-10 hours | Intermediate | Self-etching primer, proper cleaning, thin paint coats |
| Intricate Wrought Iron | 10-16 hours | Advanced | Spray application, multiple angles, detail attention |
| Simple Steel Chairs | 4-8 hours | Beginner | Good preparation, steady brush technique, patience |
Garden Bench Weatherproofing: A steel garden bench purchased unfinished required painting before outdoor placement. The project focused on maximum weather protection from the start. After cleaning, rust-inhibiting primer was applied to all surfaces, including undersides and joints. Three coats of exterior oil-based enamel in forest green provided the base color, followed by two coats of spar urethane for UV and moisture protection. Special attention was paid to bench legs and ground-contact areas with extra coats. The comprehensive approach added only 2 hours to the project but ensures the bench will withstand 5-7 years of outdoor exposure without rust or paint failure.
Decorative Metal Side Table Refinishing: An ornate metal side table with perforated top and scrollwork base needed refinishing to match new living room colors. The intricate details required spray painting for complete coverage. After cleaning and light sanding, spray primer was applied from multiple angles while rotating the table on a turntable. Three light coats of spray paint in metallic gold created even coverage without bridging the perforated pattern. A clear matte sealer protected the finish without adding unwanted shine. The project took 8 hours including drying time, with most time spent on careful masking and ensuring complete detail coverage.
💡 Pro Tip
Document your projects with before, during, and after photos. These images help you remember successful techniques for future projects and provide satisfaction seeing the transformation. Note paint brands, colors, and application methods on the photos—this information becomes invaluable when you need to touch up furniture years later or tackle similar pieces.
Metal Furniture Painting FAQ
Can you paint metal furniture without sanding?
You can paint metal furniture without sanding only if using self-etching or bonding primers on clean, intact finishes, but sanding dramatically improves adhesion and longevity. Powder-coated and glossy finishes require at least light sanding (150-220 grit) to create tooth for new paint to grip. Self-etching primers and bonding primers designed for slick surfaces can sometimes eliminate sanding on clean finishes. For best results and longest-lasting paint jobs, always sand to roughen the surface—this takes only 15-20 minutes but dramatically improves paint adhesion. If you skip sanding, test paint adhesion in a hidden area first by letting it cure for 72 hours, then trying to scratch it off with a fingernail.
What is the best paint for outdoor metal furniture?
Direct-to-metal (DTM) paints and oil-based exterior enamels provide the best performance for outdoor metal furniture, lasting 5-7 years in harsh conditions with proper application. DTM paints contain rust inhibitors and UV protection while bonding directly to metal surfaces. Oil-based exterior enamels offer similar durability at lower cost but require longer drying times. For maximum protection, use rust-inhibiting primer even under DTM paints, then apply 2-3 coats of topcoat. Premium exterior acrylics formulated specifically for metal provide a water-based alternative with 80-90% of oil-based durability. Avoid standard interior paints and general-purpose exterior latex—these lack the rust protection and flexibility needed for outdoor metal furniture.
How long does painted metal furniture last outdoors?
Properly painted metal furniture lasts 4-7 years outdoors before requiring repainting, with DTM paints and quality oil-based enamels achieving 6-7 years in moderate climates. Standard exterior paints typically last 3-4 years. Harsh conditions—intense sun, high humidity, coastal salt air—reduce lifespan by 1-2 years. Regular maintenance extends paint life significantly: monthly cleaning, immediate touch-up of chips, and reapplication of clear protective coatings every 2-3 years can double the time between full repainting. Furniture stored indoors during winter months or covered when not in use lasts considerably longer than pieces exposed to weather year-round.
Should I use spray paint or brush paint for metal furniture?
Spray paint provides the smoothest finish and works best for intricate details, while brush painting offers better control on large, flat surfaces with less setup and waste. For furniture with ornamental details, curves, or hard-to-reach areas, spray painting delivers professional results faster with more complete coverage. Chairs with spindles, decorative tables, and pieces with scrollwork benefit most from spraying. For simple pieces with large, flat surfaces like filing cabinets and basic tables, brush painting with quality synthetic brushes or foam rollers produces excellent results. Many painters use a combination approach—spraying intricate areas and brushing flat surfaces. Your workspace also matters: spray painting requires outdoor space or excellent ventilation, while brushing works fine indoors with standard ventilation.
Do I need to remove old paint before repainting metal furniture?
You only need to remove old paint if it's peeling, bubbling, or poorly adhered—intact paint can be painted over after cleaning, sanding, and priming. Test existing paint by pressing strong tape against it and pulling quickly; if paint comes off, complete removal is necessary. Firmly adhered paint only needs cleaning, light sanding (150-180 grit) to dull the surface, and priming. However, multiple layers of old paint or thick, uneven buildup should be removed for best results. For furniture with historical or sentimental value, complete paint removal to bare metal provides the longest-lasting refinishing. Use chemical strippers for intricate pieces or wire wheels for simpler furniture. When painting over existing finishes, use a bonding primer to ensure new paint adheres properly.
How do I prevent rust when painting metal furniture?
Prevent rust by removing all existing rust, applying rust-inhibiting primer containing zinc or phosphoric acid, using paint with rust protection, and sealing with clear topcoat. Start by cleaning metal thoroughly and removing any rust with sandpaper or wire brushes until you reach bright metal. Apply rust-converting products to areas with stubborn rust stains. Use rust-inhibiting primer—these chemically prevent rust formation even if moisture penetrates to the metal. Choose topcoat paints with rust inhibitors, especially for outdoor furniture. Apply 2-3 coats for complete coverage without thin spots. Finish with clear polyurethane or spar urethane to seal paint and prevent moisture penetration. Pay extra attention to joints, crevices, and ground-contact areas where moisture accumulates. For comprehensive metal painting techniques, see our guide on painting metal surfaces.
Can I paint aluminum patio furniture?
Yes, aluminum furniture can be painted successfully using self-etching primer or dedicated aluminum primer that microscopically roughens the surface for paint adhesion. Aluminum's smooth, non-porous surface resists paint adhesion, making proper primer selection critical. Clean aluminum thoroughly with TSP or degreaser, rinse well, and allow complete drying. Sand lightly with 180-220 grit sandpaper to dull any glossy finish. Apply self-etching primer according to label directions—these products typically require specific temperature and humidity ranges for proper etching. After primer dries (usually 1-2 hours), apply 2-3 coats of exterior acrylic or oil-based paint. Aluminum doesn't rust, so rust-inhibiting primers aren't necessary, but UV-resistant topcoats extend paint life on outdoor furniture.
How long should I wait between coats when painting metal furniture?
Wait 2-4 hours between coats for most paints, with water-based acrylics requiring 2-3 hours and oil-based paints needing 4-6 hours at 70°F with 50% humidity. Always check your specific product's label for manufacturer recommendations—some fast-dry formulas allow recoating in 1 hour, while others require overnight drying. Temperature and humidity significantly affect drying times: cold weather (below 50°F) can double drying times, while hot, dry conditions speed drying. Touch the paint lightly in an inconspicuous area—if it feels dry and doesn't transfer to your finger, it's ready for another coat. Waiting longer than minimum recoat times is always safe and often produces better results than rushing.
Conclusion
Painting metal furniture transforms worn, dated pieces into beautiful, functional elements that enhance your indoor and outdoor spaces. Success requires understanding the unique challenges metal presents—smooth surfaces that resist adhesion, rust formation, and exposure to weather—and addressing them with proper preparation, appropriate paint selection, and protective finishing. Whether you're refreshing vintage wrought iron, updating office furniture, or weatherproofing new pieces, the techniques covered in this guide provide the foundation for professional-quality results.
The key to lasting success lies in preparation and patience. Thorough cleaning, rust removal, and surface roughening create the foundation for paint adhesion. Rust-inhibiting primers prevent oxidation that would otherwise destroy your finish from beneath. Multiple thin coats applied with appropriate drying time between each produce smoother, more durable finishes than rushing with thick applications. For outdoor furniture, weather-resistant paints and clear protective topcoats extend the life of your work by years.
Remember that furniture type influences your approach—intricate wrought iron demands different techniques than flat filing cabinets, and outdoor pieces require more robust protection than indoor decorative items. Match your methods to your specific project, investing extra time in high-value pieces while streamlining processes for simple furniture. The satisfaction of transforming tired metal furniture into stunning focal points makes the effort worthwhile, and proper execution ensures your painted pieces remain beautiful for 5-7 years or more. For additional guidance on painting metal surfaces, explore our comprehensive resources covering specialized techniques, troubleshooting, and advanced finishing methods.