Complete Guide to Sanding Metal Before Painting
 by michael daigle
Summary
A smooth, flawless paint finish on metal starts long before you open the first paint can. The secret lies in proper surface preparation, and sanding metal for painting is the most critical step in this process. Without adequate sanding, even the highest-quality paint will peel, chip, or fail prematurely, wasting your time and money on a project that won't last.
Whether you're refinishing outdoor furniture, restoring automotive parts, or painting structural steel, the sanding process determines how well paint bonds to the metal surface. Proper sanding removes oxidation, smooths imperfections, and creates the ideal texture for paint adhesion. The difference between a professional-looking finish and a disappointing failure often comes down to using the correct sandpaper grit, applying proper technique, and understanding how different metals respond to sanding.
This guide walks you through every aspect of sanding metal before painting, from selecting tools and materials to executing step-by-step techniques that deliver lasting results. You'll discover when to use wet versus dry sanding, how to progress through grit sequences, and which methods work best for steel, aluminum, and galvanized surfaces. For comprehensive guidance on all aspects of metal painting projects, see our Painting Metal Surfaces: Techniques and Best Practices resource.
Key Takeaways
- Start with 80-grit sandpaper for heavy rust or paint removal, progress to 120-grit for smoothing, and finish with 220-grit for optimal paint adhesion
- Always sand in the direction of the metal grain or in circular motions to avoid visible scratches that telegraph through paint
- Remove 100% of sanding dust with tack cloths and mineral spirits before priming—residual dust causes adhesion failure and rough finishes
- Wet sanding with 400-600 grit between paint coats creates glass-smooth finishes but requires complete drying before recoating
- Power sanders save time on large surfaces but hand sanding provides better control on edges, curves, and detailed areas
- Different metals require adjusted techniques: aluminum needs gentler pressure, galvanized requires light sanding to preserve zinc coating
Why Sanding Metal Before Painting is Essential
Sanding metal before painting is essential because it creates microscopic surface texture for mechanical paint bonding, removes oxidation and contaminants that prevent adhesion, and reveals defects requiring correction before painting. Metal surfaces are naturally smooth and non-porous, providing no anchor points for paint molecules to grip. Without proper sanding, paint sits on the surface like water on glass, vulnerable to peeling and chipping with minimal stress or environmental exposure.
Understanding why this preparation step is non-negotiable helps you appreciate the time investment and execute the process properly. Sanding serves multiple critical functions that directly impact paint adhesion, durability, and appearance.
Creating Mechanical Bonding Through Surface Texture
Metal surfaces present unique challenges that make sanding absolutely necessary for paint success. Unlike wood or drywall, metal is non-porous and naturally smooth, which paradoxically works against paint adhesion. Paint needs a slightly rough surface with microscopic peaks and valleys to grip onto—a completely smooth metal surface provides no mechanical anchor for paint molecules to bond with effectively.
The sanding process creates this essential surface profile through controlled abrasion. When you sand metal, you're creating thousands of tiny scratches that increase the surface area available for bonding. These microscopic grooves allow primer and paint to penetrate and lock into place, forming a mechanical bond that resists peeling and chipping. Without this texture, paint sits on top of the metal like water on glass, vulnerable to any impact or environmental stress.
Removing Contaminants and Oxidation
Beyond creating texture, sanding removes contaminants that prevent proper adhesion. Metal surfaces accumulate mill scale (a flaky oxide layer from manufacturing), rust, old paint, grease, and oxidation. Each of these substances acts as a barrier between fresh paint and clean metal. Rust is particularly problematic because it continues to spread beneath paint, eventually causing bubbling and failure. Sanding cuts through these layers to expose fresh, clean metal that accepts primer and paint readily.
💡 Pro Tip
The ideal surface profile for paint adhesion measures 1.5 to 3.0 mils (thousandths of an inch) in depth. This corresponds to the texture created by 120-180 grit sandpaper on most metals. You can verify proper texture by running your hand across the sanded surface—it should feel uniformly rough without any smooth or glossy spots remaining.
Revealing Defects and Ensuring Longevity
Proper sanding also reveals surface defects that need attention before painting. Dents, scratches, weld splatter, and uneven areas become visible once you remove surface coatings. Identifying these issues during preparation allows you to address them with filler, additional sanding, or spot repairs. Painting over hidden defects only highlights them once the paint dries, creating an unprofessional appearance that's difficult to correct without starting over.
The economic impact of skipping proper sanding becomes clear over time. Paint applied to inadequately prepared metal typically fails within 1-3 years, requiring complete removal and reapplication. Properly sanded and prepared metal surfaces maintain their finish for 7-10 years or longer, even in challenging outdoor environments. The 2-4 hours spent sanding a typical project saves countless hours of future rework and material costs.
Sandpaper Grit Guide for Metal Preparation
For metal painting preparation, use 80-grit sandpaper for rust removal and heavy prep, 120-grit for smoothing and removing coarse scratches, and 220-grit for final surface preparation before priming. This three-stage progression efficiently removes oxidation and old finishes, eliminates deep scratches from aggressive sanding, and creates the ideal 1.5-3.0 mil surface profile for optimal primer adhesion. Never skip intermediate grits or jump more than two grit levels at once, as this leaves deep scratches that finer grits cannot remove efficiently.
Selecting the right sandpaper grit at each stage of metal preparation is fundamental to achieving professional results. The grit sequence you follow determines how efficiently you remove material, how smooth the final surface becomes, and ultimately how well paint adheres.
Understanding Grit Numbers and Progression
Sandpaper grit numbers indicate the number of abrasive particles per square inch—higher numbers mean finer grit with smaller particles. Understanding this progression is crucial for sanding metal for painting because using the wrong grit at the wrong stage produces poor results. Starting too fine wastes time and fails to remove stubborn coatings, while finishing too coarse leaves visible scratches that telegraph through paint layers.
The standard progression for metal preparation follows a three-stage approach: aggressive removal, smoothing, and finish preparation. Each stage serves a specific purpose and sets up the next stage for success. Skipping stages or using improper grit sequences compromises the final result, no matter how carefully you apply the paint.
| Grit Range | Purpose | Best For | Expected Result |
|---|---|---|---|
| 40-60 Grit | Heavy removal | Thick rust, multiple paint layers, weld slag | Rapid material removal, visible scratches |
| 80-100 Grit | Moderate removal | Surface rust, single paint layer, light corrosion | Clean metal exposure, moderate texture |
| 120-150 Grit | Smoothing | Removing coarse scratches, evening surface | Smooth feel, minimal visible scratches |
| 180-220 Grit | Finish preparation | Final smoothing before primer | Optimal paint adhesion texture |
| 320-400 Grit | Between coats | Smoothing primer or base coats | Glass-smooth surface for topcoats |
| 600-1000 Grit | Final finishing | Wet sanding topcoats for show finish | Mirror-like smoothness |
Optimal Grit Sequence for Metal Painting
For typical metal painting projects, the sweet spot is 80-grit for initial preparation, 120-grit for smoothing, and 220-grit for final prep before priming. This three-step progression removes oxidation and old finishes, eliminates coarse scratches, and creates the ideal surface profile for primer adhesion. Each stage should remove the scratches from the previous stage—when you no longer see the deeper scratches from coarser grit, you're ready to move to the next finer grit.
⚠️ Common Mistake
Never jump more than two grit levels at once (for example, from 80 directly to 220). This leaves deep scratches from the coarse grit that finer grits cannot remove efficiently. The deep scratches remain visible through primer and paint, creating an unprofessional finish. Always progress gradually through intermediate grits for best results.
Abrasive Materials and Backing Types
Aluminum oxide and silicon carbide are the most common abrasive materials for metal sanding. Aluminum oxide works well for ferrous metals (steel, iron) and provides good durability at reasonable cost. Silicon carbide cuts faster and works better on non-ferrous metals (aluminum, brass, copper) but wears more quickly. For general metal preparation, aluminum oxide sandpaper in the grit ranges mentioned above handles most projects effectively.
Sandpaper backing also affects performance. Paper backing works for hand sanding and light-duty applications but tears easily. Cloth backing provides flexibility and durability for power sanding and contoured surfaces. Film backing offers the longest life and most consistent cutting action but costs significantly more. For most DIY metal painting projects, cloth-backed aluminum oxide sandpaper delivers the best balance of performance and value.
Tools and Materials for Sanding Metal
Essential tools and materials for sanding metal include:
- Sanding blocks in multiple shapes for hand sanding control
- Random orbital sander for efficient large surface preparation
- Sandpaper progression: 80-grit, 120-grit, and 220-grit sheets or discs
- NIOSH-approved N95 or P100 respirator for metal dust protection
- Safety glasses with side shields and hearing protection
- Tack cloths and mineral spirits for dust removal
- Wire brushes for initial rust and loose material removal
- Clean lint-free rags and good angled work lighting
Selecting the right tools for sanding metal dramatically affects both efficiency and results. While you can complete small projects with basic hand sanding supplies, larger surfaces benefit enormously from power tools. The key is matching tool selection to your project size, metal type, and desired finish quality.
Hand Sanding Tools and Blocks
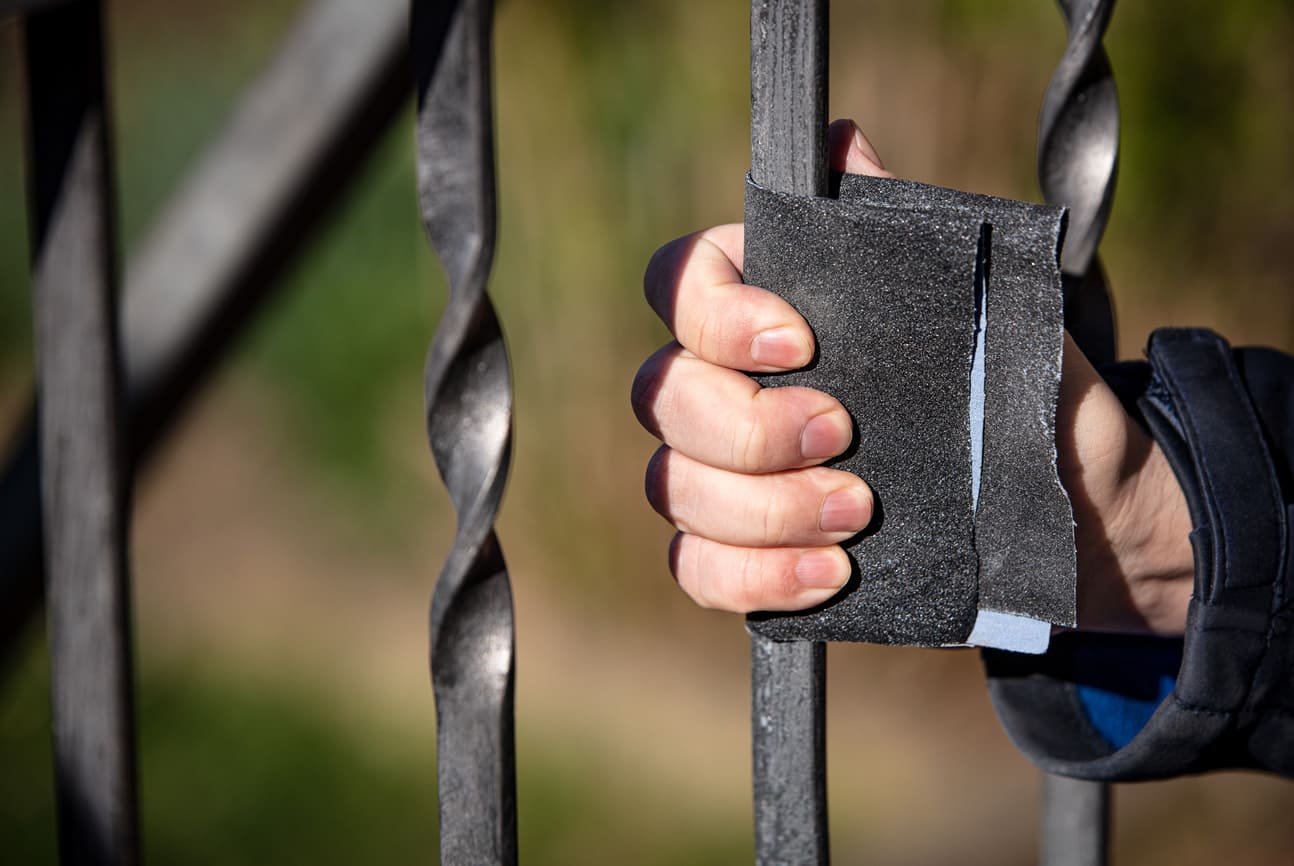
Hand sanding tools provide maximum control and work well for small areas, edges, curves, and detail work. Sanding blocks in various shapes distribute pressure evenly and prevent finger grooves or uneven spots. Rubber blocks work best for flat surfaces, foam blocks conform to gentle curves, and contour blocks match specific shapes like pipes or moldings. Always wrap sandpaper tightly around blocks—loose paper bunches and creates uneven sanding patterns.
✓ Recommended Products
- 3M Pro Grade Precision Sanding Block Set - Includes flat, curved, and detail blocks with comfortable grips and sandpaper storage compartments
- Gator Dual-Angle Sanding Sponges - Reusable sponges in multiple grits that conform to contours and reach tight spaces
- Norton 3X Hand Sanding Sheets - Professional-grade aluminum oxide sheets that last 3x longer than standard sandpaper
Power Sanders for Metal Preparation
Power sanders accelerate the process significantly but require practice to avoid common problems like gouging, uneven surfaces, or excessive heat buildup. Random orbital sanders are the most versatile choice for metal preparation, combining rotary and orbital motion to create a scratch pattern that's virtually invisible under paint. These sanders work efficiently on flat surfaces while their circular pad design navigates gentle curves reasonably well.
| Tool Type | Best Applications | Speed (sq ft/hr) | Skill Level | Price Range |
|---|---|---|---|---|
| Hand Sanding Block | Small areas, edges, detail work | 5-10 | Beginner | $5-$20 |
| Random Orbital Sander | Large flat surfaces, gentle curves | 40-60 | Intermediate | $50-$200 |
| Detail Sander | Corners, tight spaces, intricate shapes | 8-15 | Beginner | $30-$100 |
| Belt Sander | Heavy removal, large flat areas | 60-80 | Advanced | $80-$300 |
| Angle Grinder | Rust removal, weld grinding, heavy stock removal | 50-70 | Advanced | $40-$150 |
Essential Materials and Supplies
Beyond sanders themselves, essential materials include a progression of sandpaper grits, safety equipment, and cleaning supplies. Purchase sandpaper in bulk packs rather than individual sheets—you'll use more than expected, and bulk buying saves money. For power sanders, hook-and-loop (Velcro-style) discs attach and remove quickly, while PSA (pressure-sensitive adhesive) discs cost less but are single-use only.
🚨 Safety First
Metal sanding creates fine dust particles and sharp metal fragments that pose serious health risks. Always wear NIOSH-approved N95 or P100 respirators—not simple dust masks—to prevent lung damage from metal particles. Safety glasses with side shields protect against flying debris, and hearing protection is essential when using power tools. Work in well-ventilated areas or use dust extraction systems to minimize airborne particles.
Additional materials that improve results include tack cloths for dust removal, mineral spirits for final cleaning, and various grades of steel wool for final smoothing. Wire brushes help remove loose rust and scale before sanding begins. For wet sanding applications, keep a spray bottle of water or cutting fluid handy, along with plenty of clean rags for wiping surfaces. A good work light positioned at an angle across the surface helps identify areas that need additional sanding attention.
Investing in Quality Equipment
Quality tools pay for themselves through better results and longer service life. A $100 random orbital sander from a reputable brand like DeWalt, Makita, or Bosch will outlast and outperform three $30 discount store models. The same principle applies to sandpaper—premium brands like 3M, Norton, and Mirka cut faster, last longer, and produce more consistent results than economy alternatives. For detailed techniques on achieving professional results, consult our Painting Metal Surfaces: Techniques and Best Practices guide.
Step-by-Step Metal Sanding Process
To sand metal for painting properly, follow these steps:
- Clean and degrease the surface with TSP or automotive degreaser, rinse thoroughly, and dry completely
- Remove loose rust, flaking paint, and mill scale with a wire brush
- Sand with 80-grit sandpaper to remove all rust, old paint, and oxidation down to bare metal
- Sand with 120-grit sandpaper to remove scratches from 80-grit and create uniform texture
- Sand with 220-grit sandpaper to create optimal surface profile for primer adhesion
- Remove all dust with vacuum, tack cloth, and mineral spirits wipe
- Apply primer within 1-2 hours to prevent flash rusting on bare steel
Following a systematic sanding process ensures complete coverage and consistent results across the entire metal surface. Rushing through steps or working haphazardly leaves problem areas that become visible once paint is applied.
Surface Assessment and Initial Preparation
Begin by assessing the metal surface condition and determining your starting grit. Heavily rusted or multi-layer painted surfaces require aggressive 60-80 grit sandpaper, while lightly oxidized bare metal can start at 120 grit. Clean the surface with degreaser and let it dry completely—sanding over grease or oil clogs sandpaper immediately and spreads contaminants across the surface. Remove any loose rust, flaking paint, or debris with a wire brush before sanding begins.
| Step | Action | Time Required | Key Points |
|---|---|---|---|
| 1 | Clean and degrease surface | 10-15 min | Use TSP or automotive degreaser, rinse thoroughly, dry completely |
| 2 | Remove loose material with wire brush | 5-10 min | Focus on rust, flaking paint, and mill scale |
| 3 | Initial sanding with 80-grit | 20-30 min per 10 sq ft | Remove all rust, old paint, and oxidation to bare metal |
| 4 | Intermediate sanding with 120-grit | 15-20 min per 10 sq ft | Remove scratches from 80-grit, create uniform texture |
| 5 | Final sanding with 220-grit | 10-15 min per 10 sq ft | Create optimal surface profile for primer adhesion |
| 6 | Dust removal and final cleaning | 10-15 min | Tack cloth, then wipe with mineral spirits on clean rag |
| 7 | Prime within 1-2 hours | Variable | Prevents flash rusting on bare steel surfaces |
Proper Sanding Technique and Motion
When sanding, maintain consistent pressure and motion patterns. For flat surfaces, sand in overlapping straight lines or gentle circular patterns, working systematically across the entire area. Avoid concentrating on one spot too long, which creates low spots or heat buildup. Keep the sander moving at a steady pace—roughly 1-2 inches per second for power sanders, slightly slower for hand sanding. The goal is even material removal across the entire surface.
💡 Pro Tip
Check your progress frequently by wiping the surface with a clean, dry cloth and examining it under angled light. This reveals shiny spots (not sanded enough), remaining rust (needs more aggressive grit), or deep scratches (need to step back to intermediate grit). Professional painters check every 2-3 minutes during initial sanding to catch problems early before they become difficult to correct.
Sanding Contoured and Curved Surfaces
For contoured or curved surfaces, adapt your technique to follow the metal's shape. Use flexible sanding sponges or wrap sandpaper around foam blocks that conform to curves. Sand along the length of pipes, tubes, or cylindrical objects rather than across them. Inside curves and recessed areas require detail sanders or hand sanding with folded sandpaper—power tools can't reach these spaces effectively.
Between grit changes, thoroughly remove all sanding dust before proceeding to finer grits. Dust particles from coarse sandpaper act like additional abrasive when you switch to finer grits, creating random deep scratches that are difficult to remove. Use a vacuum with a brush attachment, followed by a tack cloth, to eliminate all dust. Inspect the surface carefully before moving to the next grit—any remaining rust, paint, or oxidation must be addressed before progressing.
Final Preparation and Priming Timeline
The final 220-grit sanding creates the ideal surface for primer. Sand until the entire surface has a uniform, slightly rough texture with no shiny spots, rust, or deep scratches visible. The metal should feel consistently rough to the touch across all areas. This uniform texture ensures even primer adhesion and prevents problems like peeling, bubbling, or premature failure. Apply primer as soon as possible after final sanding—bare steel begins oxidizing (flash rusting) within hours of exposure to air.
Wet Sanding vs. Dry Sanding Metal
Dry sanding is used for initial metal preparation before priming, removing rust and creating adhesion texture, while wet sanding is used between paint coats to smooth primer or topcoat surfaces without generating dust. Never wet sand bare metal before priming as water causes immediate flash rusting on steel and iron. Wet sanding with 400-600 grit waterproof sandpaper between coats produces glass-smooth finishes by preventing heat buildup and carrying away debris in a slurry.
The choice between wet and dry sanding depends on your project stage, desired finish quality, and metal type. Each method offers distinct advantages and limitations that make it more suitable for specific applications.
Dry Sanding for Initial Preparation
Dry sanding is the standard method for initial metal preparation before priming. It removes material quickly, works with all power sanders, and requires no additional equipment beyond sandpaper and safety gear. Dry sanding generates significant dust, but this dust actually helps you see your progress—areas that still appear shiny or discolored need more sanding attention. The dust also acts as a mild lubricant, preventing sandpaper from loading (clogging) as quickly as it would when wet.
Wet Sanding for Smooth Finishes
Wet sanding introduces water or cutting fluid to the sanding process, creating a slurry that carries away debris and prevents dust generation. This method is primarily used between paint coats rather than for initial metal preparation. Wet sanding with 400-600 grit sandpaper smooths primer or base coat surfaces to glass-like finishes, removing orange peel texture, dust nibs, and minor imperfections. The water lubricates the sandpaper and prevents heat buildup that could damage fresh paint.
| Aspect | Dry Sanding | Wet Sanding |
|---|---|---|
| Primary Use | Initial surface preparation, rust removal | Between paint coats, final finishing |
| Dust Generation | ❌ Heavy dust requires respirator and ventilation | ✅ Minimal dust, creates slurry instead |
| Material Removal | ✅ Fast cutting action, aggressive removal | ❌ Slower cutting, gentler action |
| Surface Quality | Good for paint adhesion texture | ✅ Superior smoothness for topcoats |
| Equipment Needed | ✅ Works with power and hand tools | ❌ Hand sanding only, no power tools |
| Drying Time | ✅ Immediate priming/painting possible | ❌ Must dry completely (4-24 hours) |
| Cost | Standard sandpaper | Waterproof sandpaper costs 20-30% more |
| Visibility | ✅ Easy to see progress and problem areas | ❌ Wet surface obscures progress |
When wet sanding metal, use waterproof sandpaper specifically designed for this application. Standard sandpaper disintegrates when wet, wasting materials and creating inconsistent results. Keep a spray bottle handy to maintain consistent moisture on the surface—too little water causes the sandpaper to drag and scratch, while too much water dilutes the cutting action excessively. Wipe the surface frequently with a clean, damp cloth to check your progress and remove slurry buildup.
⚠️ Common Mistake
Never wet sand bare metal before priming. Water exposure causes immediate oxidation (flash rust) on steel and iron surfaces, creating a contaminated layer that prevents proper primer adhesion. Wet sanding is only appropriate between primer coats, between base coats, or for final topcoat finishing—always on painted surfaces, never on bare metal.
Advanced Wet Sanding Techniques
For automotive and show-quality finishes, wet sanding progresses through ultra-fine grits (800, 1000, 1500, 2000) to achieve mirror-like smoothness. This level of refinement is unnecessary for most DIY metal painting projects but produces stunning results on furniture, decorative pieces, or restoration work. Each successive grit removes the scratches from the previous grit, with the finest grits creating a surface so smooth it reflects light like glass.
Some professional painters use a hybrid approach called damp sanding, which involves lightly misting the surface during dry sanding to reduce dust without creating a slurry. This technique works well in enclosed spaces where dust control is critical but full wet sanding isn't appropriate. Damp sanding requires careful moisture control—too much water creates the same problems as wet sanding bare metal, while too little provides inadequate dust suppression.
Power Sanding vs. Hand Sanding: Which is Better?
Power sanding excels for large flat surfaces over 10 square feet, removing material 10 times faster than hand sanding (50-60 sq ft/hr vs 5-10 sq ft/hr), while hand sanding provides superior control for edges, corners, curves, and detail work where power tools can't reach effectively. The optimal strategy uses power sanding for 70-80% of work on accessible flat areas, then hand sanding for edges, details, and final 220-grit smoothing. Both methods have essential roles in metal preparation, and professional results come from using each where it excels.
The power sanding versus hand sanding debate has a simple answer: both have essential roles in metal preparation, and the best results come from using each method where it excels.
Advantages of Power Sanding
Power sanders excel at removing material quickly from flat or gently curved surfaces measuring more than a few square feet. A random orbital sander can prepare 50-60 square feet per hour compared to 5-10 square feet with hand sanding—a 10x efficiency gain. This speed advantage makes power sanding essential for large projects like metal doors, railings, outdoor furniture, or automotive panels. The consistent motion of power sanders also produces more uniform surface texture than hand sanding, reducing the risk of uneven spots or finger grooves.
However, power sanders have significant limitations. They struggle with edges, corners, and tight spaces where the tool base can't make full contact with the surface. Power sanders can round over sharp edges or remove too much material from high spots if not carefully controlled. They generate heat that can warp thin metal or damage existing paint in areas you want to preserve. The aggressive cutting action of power sanders makes them risky near delicate details, welded seams, or decorative elements.
| Consideration | Power Sanding | Hand Sanding | Best Choice |
|---|---|---|---|
| Large flat surfaces (10+ sq ft) | ✅ 50-60 sq ft/hr | ❌ 5-10 sq ft/hr | Power sanding |
| Edges and corners | ❌ Rounds edges, poor contact | ✅ Precise control | Hand sanding |
| Curved or contoured surfaces | ⚠️ Limited by pad size | ✅ Conforms to any shape | Hand sanding |
| Detail work and tight spaces | ❌ Tool won't fit | ✅ Reaches anywhere | Hand sanding |
| Surface uniformity | ✅ Consistent pattern | ⚠️ Requires technique | Power sanding |
| Material cost | Higher (discs, electricity) | ✅ Lower (sheets only) | Hand sanding |
| Learning curve | ⚠️ Practice required | ✅ Intuitive | Hand sanding |
| Noise level | ❌ 85-95 dB | ✅ Silent | Hand sanding |
When Hand Sanding Excels
Hand sanding provides the control and tactile feedback necessary for precision work. You feel exactly how much pressure you're applying and can adjust instantly for different surface conditions. Hand sanding reaches into corners, along edges, and around obstacles that power tools can't access. For small projects under 10 square feet, hand sanding often takes less total time than setting up power tools, changing sandpaper, and cleaning equipment afterward.
💡 Pro Tip
Start most projects with power sanding to quickly remove the bulk of old finish and create base-level smoothness. Switch to hand sanding for the final 220-grit stage, which allows you to address any areas the power sander missed and ensures edges and details receive adequate attention. This hybrid approach combines the efficiency of power tools with the precision of hand work.
Combining Methods for Best Results
The optimal strategy uses power sanding for 70-80% of the work on large surfaces, then hand sanding for edges, details, and final smoothing. Begin with a random orbital sander and 80-120 grit discs to remove rust, old paint, and oxidation from accessible flat areas. Switch to hand sanding with 120-grit for edges, corners, and any spots the power sander couldn't reach effectively. Complete the entire project with hand sanding using 220-grit to create uniform final texture across all surfaces.
Budget considerations also influence tool selection. Quality random orbital sanders cost $80-200, while professional-grade models exceed $300. For occasional DIY projects, this investment may not be justified—hand sanding with $10-20 worth of sandpaper and blocks produces excellent results with more time investment. For regular metal painting projects or professional work, power sanders pay for themselves quickly through time savings and improved consistency. Learn more about selecting the right approach for your specific project in our comprehensive Painting Metal Surfaces: Techniques and Best Practices resource.
Sanding Different Types of Metal (Steel, Aluminum, Galvanized)
Different metals respond differently to sanding, requiring adjusted techniques, grit selection, and pressure to achieve optimal results. Understanding these differences prevents damage to softer metals, preserves protective coatings where appropriate, and ensures proper surface preparation for each metal type. The same aggressive approach that works well on steel can ruin aluminum or galvanized surfaces.
Sanding Steel and Stainless Steel
Steel is the most forgiving metal for sanding and responds well to standard techniques. Carbon steel, the most common type for structural applications and outdoor furniture, tolerates aggressive sanding without damage. Start with 80-grit for rust removal, progress through 120-grit for smoothing, and finish with 220-grit for paint preparation. Steel's hardness means you can apply firm pressure without gouging or creating uneven spots. The primary concern with steel is flash rusting—bare steel oxidizes within hours of exposure to moisture, so prime immediately after final sanding.
Stainless steel requires gentler treatment despite its strength. While stainless resists corrosion, aggressive sanding can damage the chromium oxide layer that provides this protection. Use 120-grit as your starting point unless removing heavy rust or old paint, and avoid excessive pressure that generates heat. Heat discoloration on stainless steel is difficult to remove and may require professional refinishing. For stainless steel that will remain unpainted, sand in the direction of the existing grain pattern to maintain the metal's characteristic appearance.
| Metal Type | Starting Grit | Final Grit | Pressure | Special Considerations |
|---|---|---|---|---|
| Carbon Steel | 80-grit | 220-grit | Firm | Prime within 2 hours to prevent flash rust |
| Stainless Steel | 120-grit | 220-grit | Light-Medium | Sand with grain, avoid heat buildup |
| Aluminum | 120-grit | 220-grit | Light | Clogs sandpaper quickly, change frequently |
| Galvanized Steel | 180-grit | 220-grit | Very Light | Preserve zinc coating, minimal sanding |
| Cast Iron | 80-grit | 180-grit | Firm | Brittle surface, avoid impact damage |
| Brass/Copper | 150-grit | 220-grit | Light | Soft metals, sand gently to avoid gouging |
Aluminum Sanding Techniques
Aluminum presents unique challenges because it's soft and clogs sandpaper rapidly. Aluminum particles fill the spaces between abrasive grains, creating a smooth, ineffective surface that generates heat rather than cutting. Use silicon carbide sandpaper rather than aluminum oxide—it cuts aluminum more efficiently and resists loading better. Apply light pressure and change sandpaper frequently when it stops cutting effectively. For bare aluminum that will be painted, start with 120-grit and progress to 220-grit, using shorter sanding sessions to prevent heat buildup that can warp thin aluminum.
Galvanized Steel Special Considerations
⚠️ Common Mistake
Never sand galvanized steel aggressively or down to bare metal. The zinc coating that makes galvanized steel corrosion-resistant is only 1-3 mils thick and sands off easily. Once removed, the steel beneath rusts rapidly and loses the galvanizing benefit. Use 180-220 grit sandpaper with light pressure only to dull the surface for paint adhesion, not to remove material.
Galvanized steel requires the gentlest approach of all common metals. The zinc coating provides excellent corrosion protection but creates a smooth, non-porous surface that paint struggles to bond with. The goal when sanding galvanized metal is surface dulling, not material removal. Use 180-220 grit sandpaper with light pressure, sanding just enough to remove the shiny surface and create slight texture. Many professionals prefer chemical etching over sanding for galvanized steel—products like white vinegar or commercial galvanized metal primers etch the surface chemically without removing the protective zinc layer.
Cast Iron, Brass, and Copper
Cast iron combines hardness with brittleness, making it prone to chipping if impacted during sanding. Remove rust with 80-grit sandpaper, but avoid dropping tools or striking the surface with sanding equipment. Cast iron's porous nature means it accepts paint readily once rust is removed, so you can stop at 180-grit rather than progressing to 220-grit. The slight additional texture from 180-grit actually improves paint adhesion on cast iron's grainy surface.
Brass and copper are decorative metals that are rarely painted, but when paint is necessary, their softness requires careful sanding. Start with 150-grit to remove oxidation (the green patina on copper or tarnish on brass) and progress to 220-grit for smoothing. Apply minimal pressure—these metals gouge easily, creating deep scratches that telegraph through paint. If preserving the metal's natural appearance in some areas, mask carefully before sanding to maintain sharp boundaries between painted and unpainted sections.
Sanding Between Coats of Paint
Sanding between paint coats is optional for basic projects but essential for high-quality finishes, using 320-400 grit for primer coats and 400-600 grit for topcoats to remove dust nibs, orange peel texture, and imperfections. Sand 2-4 hours after application when paint is hard enough to powder but not fully cured. Always remove all sanding dust before applying the next coat, and never sand the final topcoat unless you plan to apply additional coats or polish afterward.
Sanding between paint coats transforms good finishes into exceptional ones by eliminating surface imperfections before they become permanent. This intermediate sanding removes dust nibs, brush marks, orange peel texture, and minor runs or sags that occur during application.
Purpose and Timing of Inter-Coat Sanding
The purpose of inter-coat sanding differs fundamentally from initial surface preparation. You're not creating adhesion texture—the first coat of primer or paint already bonds to the prepared metal. Instead, you're smoothing the applied coating to provide an ideal surface for subsequent coats. This process also slightly abrades the previous coat, promoting mechanical bonding between layers and preventing delamination or peeling.
Timing is critical when sanding between coats. Paint must cure hard enough to sand without gumming up sandpaper, but not so long that it becomes extremely hard and difficult to smooth. For most primers and paints, this sweet spot occurs 2-4 hours after application in normal conditions (70°F, 50% humidity). Test a small inconspicuous area first—if the paint rolls up or clogs sandpaper immediately, wait longer. If it sands to a fine powder, you're ready to proceed.
💡 Pro Tip
Use 320-400 grit sandpaper for sanding between primer coats and 400-600 grit for sanding between topcoats. These ultra-fine grits smooth the surface without cutting through to underlying layers. Sand with very light pressure using circular motions, and check frequently to avoid sanding through edges or high spots where paint is thinnest.
Sanding Primer Coats
For primer coats, use 320-400 grit sandpaper to smooth the surface and remove any dust particles that settled during drying. Primer is designed to be sanded and provides a thick, forgiving layer that tolerates more aggressive sanding than topcoats. Focus on obvious imperfections like dust nibs, drips, or rough spots. You don't need to sand every square inch uniformly—spot sanding problem areas while leaving smooth areas untouched saves time without compromising results.
| Coat Type | Sandpaper Grit | Technique | Purpose | Time After Application |
|---|---|---|---|---|
| Primer (1st coat) | 320-grit | Moderate pressure, circular motion | Remove dust nibs, smooth rough areas | 2-4 hours |
| Primer (2nd coat) | 400-grit | Light pressure, circular motion | Create glass-smooth surface for topcoat | 2-4 hours |
| Base Coat | 400-600 grit | Very light pressure, straight lines | Remove orange peel, level surface | 4-6 hours |
| Topcoat (intermediate) | 600-800 grit | Wet sand, minimal pressure | Perfect smoothness between color coats | 6-12 hours |
| Final Topcoat | 1000-2000 grit | Wet sand, then polish | Mirror finish (show quality only) | 24-48 hours |
Sanding Base and Topcoats
Base coat sanding requires more care because you're working with the actual color layer. Use 400-600 grit sandpaper with very light pressure, sanding just enough to knock down imperfections. Sand in straight lines rather than circles to minimize visible scratches. If you sand through the base coat to primer, you'll need to recoat that area and sand again—prevention through light pressure is much easier than correction.
Wet sanding between topcoats produces the smoothest possible finish for show-quality results. Use 600-1000 grit waterproof sandpaper with plenty of water, sanding with minimal pressure in straight, overlapping lines. Wipe the surface frequently to check progress—you're looking for a uniformly dull, matte appearance. Any shiny spots indicate areas that need additional sanding. After wet sanding, rinse thoroughly, dry completely, and apply the final topcoat.
⚠️ Common Mistake
Never sand clear coats or final topcoats unless you plan to apply additional coats afterward. Sanding scratches in the final layer remain visible permanently unless you apply another coat or polish them out. If the final coat has imperfections, either live with them, apply another coat after sanding, or use rubbing compound and polish to smooth without additional paint.
Post-Sanding Cleaning and Coat Schedules
After each sanding session, remove all dust before applying the next coat. Use a tack cloth to pick up fine dust particles, then wipe with a clean, lint-free cloth dampened with mineral spirits. Any dust left on the surface gets trapped in the next coat, creating permanent imperfections. For wet sanding, rinse thoroughly with clean water and dry completely—water spots or residue prevent proper adhesion of subsequent coats.
The number of coats and sanding sessions depends on desired finish quality. Basic projects require only one primer coat (sanded) and two topcoats (no sanding). High-quality finishes use two primer coats (both sanded), two base coats (first sanded), and two topcoats (first sanded, second left as-is). Show-quality finishes may involve 3-4 primer coats, 3-4 base coats, and 3-4 clear coats, with sanding between each layer and final wet sanding with ultra-fine grits followed by polishing.
Common Sanding Mistakes to Avoid
The most common sanding mistakes to avoid include:
- Skipping grit levels (jumping from 80 to 220 without 120 intermediate)
- Inadequate dust removal before priming (causes adhesion failure)
- Sanding in one direction only (creates visible linear scratches)
- Over-sanding edges and rounding them over
- Not checking progress frequently (missing spots or over-sanding areas)
- Wet sanding bare metal (causes immediate flash rust)
- Using worn, glazed sandpaper (generates heat without cutting)
- Delaying primer application beyond 2 hours (allows oxidation)
Even experienced DIYers make sanding mistakes that compromise paint adhesion and finish quality. Understanding these common errors helps you avoid them, saving time, materials, and frustration.
Grit Progression and Pressure Errors
The most frequent mistake is using incorrect grit progression, either starting too fine or jumping too many grit levels between stages. Starting with 220-grit on heavily rusted metal wastes hours accomplishing little—the fine grit can't remove substantial material efficiently. Conversely, stopping at 80-grit leaves scratches so deep they telegraph through primer and paint. Skipping intermediate grits (jumping from 80 directly to 220) leaves deep scratches that finer grits cannot remove within reasonable time frames.
Applying inconsistent pressure creates uneven surfaces with high and low spots that become obvious once paint is applied. Power sanders magnify this problem—pressing harder in some areas removes more material, creating depressions that fill with excess paint. Conversely, too-light pressure in other areas leaves insufficient texture for adhesion. Maintain steady, moderate pressure throughout the sanding process, letting the abrasive do the work rather than forcing it.
Heat Buildup and Equipment Issues
🚨 Safety First
Sanding without proper dust protection causes serious long-term health consequences. Metal dust particles are small enough to bypass your body's natural defenses and lodge deep in lung tissue, causing conditions like metal fume fever, pneumoconiosis, or heavy metal poisoning. Simple dust masks provide inadequate protection—use NIOSH-approved respirators with P100 filters rated for metal dust.
Heat buildup from excessive sanding speed or pressure damages both the metal and sandpaper. Power sanders running too fast or pressed too hard generate friction heat that warps thin metal, burns paint you're trying to preserve, and glazes sandpaper so it stops cutting. If the surface feels hot to the touch, you're generating too much heat. Reduce pressure, slow down tool speed, or take breaks to let everything cool. For hand sanding, if your arm tires quickly, you're pressing too hard—let the sandpaper's abrasive action do the work.
| Mistake | Why It's Wrong | Consequence | Correct Approach |
|---|---|---|---|
| Skipping grit levels | Leaves deep scratches finer grits can't remove | Scratches visible through paint | Progress gradually: 80→120→220 |
| Inadequate dust removal | Dust acts as barrier between metal and primer | Paint peeling and adhesion failure | Vacuum, tack cloth, mineral spirits wipe |
| Sanding in one direction only | Creates visible linear scratch pattern | Scratches show through paint | Use circular motion or cross-hatch pattern |
| Over-sanding edges | Rounds over sharp edges, removes too much material | Unnatural appearance, weak edges | Hand sand edges with light pressure |
| Not checking progress | Miss spots or over-sand areas | Uneven surface, visible imperfections | Wipe and inspect every 2-3 minutes |
| Sanding wet bare metal | Causes immediate oxidation (flash rust) | Contaminated surface, poor adhesion | Wet sand painted surfaces only |
| Using worn sandpaper | Glazed paper generates heat, doesn't cut | Wasted time, heat damage, poor results | Change paper when cutting action decreases |
| Delaying primer application | Bare steel oxidizes within hours | Flash rust prevents proper adhesion | Prime within 1-2 hours of final sanding |
Dust Removal and Edge Protection
Failing to remove all sanding dust before priming is perhaps the most consequential mistake. Even microscopic dust particles act as a barrier between metal and primer, preventing molecular bonding. Paint appears to adhere initially but fails prematurely, often peeling off in sheets. Proper dust removal requires multiple steps: vacuum with brush attachment, wipe with tack cloth, and final wipe with mineral spirits on a clean lint-free cloth. Each step removes progressively finer particles that previous methods missed.
Rounding over edges and corners happens easily with power sanders and careless hand sanding. Sharp edges are thinnest where tool pads make contact, so they sand faster than flat surfaces. Before you realize it, crisp edges become rounded and soft, changing the metal's appearance and creating weak points where paint is thinnest. Protect edges by hand sanding with light pressure, or mask them during power sanding of adjacent flat surfaces.
💡 Pro Tip
Create a sanding schedule and checklist for your project that specifies grit progression, time estimates, and inspection points. Check off each step as completed to ensure nothing is skipped or rushed. Professional painters use detailed prep checklists because consistent process execution produces consistent results—random or improvised approaches yield unpredictable outcomes.
Contamination and Rushing the Process
Contaminating the surface during sanding defeats the entire purpose of preparation. Touching sanded metal with bare hands deposits oils that prevent adhesion—always wear clean cotton or nitrile gloves after cleaning begins. Setting tools or materials on the prepared surface transfers contaminants. Sanding near uncovered areas allows dust to settle on clean sections. Maintain cleanliness throughout the process by covering adjacent areas, using dedicated clean rags, and handling prepared surfaces only with gloved hands.
Finally, rushing the sanding process to get to painting faster virtually guarantees poor results. Proper preparation takes 60-70% of total project time, but it determines 90% of the outcome. Paint applied over inadequately prepared metal looks good initially but fails within months or a few years. The time spent on thorough sanding pays dividends in durability, appearance, and long-term satisfaction with your project.
Dust Removal and Surface Cleaning After Sanding
To properly remove dust after sanding metal, follow these steps:
- Vacuum the entire surface with a shop vacuum using a brush attachment to remove loose dust
- Wipe with 2-3 tack cloths using light pressure and overlapping strokes, refolding to expose clean sections
- Wipe the entire surface with mineral spirits on a clean lint-free cloth using firm pressure
- Inspect tactilely by running a gloved hand across the surface to detect any remaining grit
- Use compressed air at low pressure (30-40 PSI) for recessed areas if needed
- Apply primer within 30-60 minutes to prevent flash rusting on bare steel
Complete dust removal after sanding is as critical as the sanding itself—even microscopic particles prevent proper paint adhesion and create surface defects. Professional painters spend 15-20 minutes on thorough cleaning after sanding because they understand that contamination is the leading cause of premature paint failure.
Initial Vacuum and Tack Cloth Treatment
Begin dust removal while sanding dust is still loose and easy to remove. Immediately after completing final sanding, use a shop vacuum with a brush attachment to remove the bulk of loose dust. Work systematically across the entire surface, using the brush to agitate dust in corners and crevices. Pay special attention to horizontal surfaces where dust settles, and inside corners where it accumulates. A vacuum with HEPA filtration prevents dust from recirculating into the air and resettling on clean surfaces.
After vacuuming, use tack cloths to pick up fine dust particles the vacuum missed. Tack cloths are sticky, resin-impregnated fabrics that grab and hold fine dust without leaving residue. Unfold the tack cloth completely and wipe across the surface using light pressure and overlapping strokes. Refold to expose clean sections as the cloth becomes loaded with dust. For average-sized projects, use 2-3 tack cloths to ensure you're always working with an effective, dust-grabbing surface.
💡 Pro Tip
After tack cloth wiping, run your hand across the surface wearing a clean nitrile glove. If you feel any grit or see dust on the glove, repeat the tack cloth process. The surface should feel completely smooth with no detectable particles. This tactile inspection catches contamination that visual inspection might miss, especially on textured or dark-colored metals.
Mineral Spirits Final Wipe
The final cleaning step uses mineral spirits (paint thinner) to remove any remaining dust and dissolve oils or contaminants. Pour mineral spirits onto a clean, lint-free cloth—never directly onto the metal surface. Wipe the entire surface using firm pressure and overlapping strokes, turning the cloth frequently to expose clean sections. Mineral spirits evaporate quickly, but wait 10-15 minutes before priming to ensure complete evaporation. This solvent wipe removes fingerprints, oils, and ultra-fine dust particles that survived vacuuming and tack cloth treatment.
| Cleaning Step | Materials Needed | Technique | What It Removes |
|---|---|---|---|
| 1. Initial Vacuum | Shop vacuum with brush attachment | Systematic coverage, brush agitation in corners | Loose sanding dust (95% of total) |
| 2. Tack Cloth | 2-3 quality tack cloths | Light pressure, overlapping strokes, refold often | Fine dust particles, embedded grit |
| 3. Mineral Spirits Wipe | Mineral spirits, lint-free cloths | Firm pressure, turn cloth frequently | Ultra-fine dust, oils, fingerprints |
| 4. Inspection | Clean glove, good lighting | Tactile and visual check | Verification of complete cleaning |
| 5. Final Air Blow | Compressed air (optional) | Low pressure, 6-8 inches distance | Dust from recessed areas and crevices |
Compressed Air and Timing Considerations
For projects with complex geometry, tight spaces, or recessed areas, compressed air provides an additional cleaning option. Use low pressure (30-40 PSI) to blow dust from areas that cleaning cloths can't reach effectively. Hold the air nozzle 6-8 inches from the surface to prevent oil contamination from the compressor reaching the metal. Always blow dust away from cleaned areas, and follow with another tack cloth wipe to remove any dust that resettled during air blowing.
⚠️ Common Mistake
Never use compressed air as your primary dust removal method. While it moves dust effectively, it also spreads it everywhere, contaminating adjacent surfaces and creating airborne particles that eventually settle back onto your work. Compressed air is supplementary to vacuum and cloth cleaning, not a replacement for them.
Timing between final cleaning and primer application significantly impacts results. Bare steel begins oxidizing (flash rusting) within 1-2 hours of exposure to humidity, creating a contaminated surface layer. Plan your work so you can apply primer immediately after cleaning—ideally within 30-60 minutes. If delays occur, re-clean with mineral spirits immediately before priming to remove any oxidation or settled dust.
Environmental Control and Documentation
Environmental conditions during cleaning affect dust behavior and cleaning effectiveness. Work in still air without fans or breezes that circulate dust. Close windows and doors to prevent outside dust infiltration. If working outdoors, choose calm days and avoid cleaning when wind might deposit debris on prepared surfaces. Temperature and humidity matter too—very cold conditions prevent mineral spirits from evaporating properly, while high humidity accelerates flash rusting on bare steel.
Maintain cleanliness throughout the priming and painting process. Cover the work area floor with clean drop cloths or cardboard to prevent dust from being kicked up by foot traffic. Keep cleaning supplies nearby for spot cleaning if contamination occurs. Wear clean clothing without loose fibers that might transfer to the surface. Professional-quality results require professional-level cleanliness from sanding through final coat application.
Document your cleaning process with photos showing dust removal steps and the final clean surface. This documentation helps troubleshoot any adhesion problems that develop later and provides a reference for future projects. Many paint manufacturers require documented surface preparation for warranty coverage—thorough cleaning documentation demonstrates you followed proper procedures.
Frequently Asked Questions
What grit sandpaper should I use for metal before painting?
Use 80-grit for rust removal and heavy prep, 120-grit for smoothing, and 220-grit for final surface preparation before priming. This three-stage progression removes oxidation and old finishes with coarse grit, eliminates the scratches from aggressive sanding with medium grit, and creates the ideal texture for primer adhesion with fine grit. Each stage should remove the scratches from the previous stage before progressing to finer grit. For lightly oxidized metal without rust, you can start at 120-grit and skip the 80-grit stage. Never jump directly from 80-grit to 220-grit—the intermediate 120-grit stage is essential for removing deep scratches that fine grit cannot address efficiently.
Should you sand metal before spray painting?
Yes, you must sand metal before spray painting to ensure proper adhesion and long-lasting results. Metal surfaces are naturally smooth and non-porous, providing no mechanical anchor for paint to grip. Sanding creates microscopic scratches and texture that allow primer and paint to bond mechanically to the surface. Without sanding, spray paint may appear to adhere initially but will peel, chip, or flake off with minimal stress or environmental exposure. The sanding process also removes oxidation, rust, mill scale, and contaminants that prevent chemical bonding between paint and metal. Even new, clean-looking metal requires light sanding with 220-grit sandpaper to dull the surface and create adequate texture for spray paint adhesion.
Do you have to sand metal before painting?
Yes, sanding metal before painting is essential for proper adhesion, durability, and professional-quality results. The only exception is brand-new metal that has been chemically etched or treated with conversion coatings specifically designed to promote paint adhesion without mechanical sanding. For all other situations—including previously painted metal, rusty metal, oxidized metal, or standard bare metal—sanding is mandatory. The sanding process serves three critical functions: creating surface texture for mechanical bonding, removing contaminants and oxidation, and revealing surface defects that need correction before painting. Skipping this step results in paint failure, typically within months or a few years, requiring complete removal and reapplication of all coatings.
How long after sanding metal should you paint?
Apply primer within 1-2 hours after sanding steel or iron to prevent flash rusting that compromises adhesion. Bare ferrous metals begin oxidizing immediately upon exposure to moisture in the air, forming a thin rust layer that prevents proper primer bonding. For aluminum, stainless steel, and other non-ferrous metals, you have more flexibility—up to 24 hours in dry conditions—but sooner is always better. Plan your work schedule so final sanding and dust removal lead directly into primer application without extended delays. If circumstances force a delay beyond 2 hours for steel, re-clean the surface with mineral spirits immediately before priming to remove any oxidation that formed. Store sanded metal indoors in low-humidity conditions if you cannot prime immediately, and avoid touching the prepared surface with bare hands.
Can you use a power sander on metal?
Yes, random orbital sanders work excellently on metal and dramatically reduce preparation time compared to hand sanding. These power tools combine rotary and orbital motion to create a scratch pattern that's virtually invisible under paint while removing material efficiently. Use random orbital sanders for large flat surfaces and gentle curves, maintaining moderate pressure and keeping the tool moving to avoid heat buildup or uneven material removal. Avoid belt sanders on thin metal as they remove material too aggressively and easily create low spots or warping. Detail sanders work well for corners and tight spaces, while angle grinders with flap discs excel at heavy rust removal but require experience to control properly. Always switch to hand sanding for final 220-grit preparation, edges, and detailed areas where power tools lack precision.
What is the best way to remove rust before painting metal?
For surface rust, use 80-grit sandpaper or a wire wheel attachment to mechanically remove rust down to clean metal. Start with a wire brush to remove loose, flaking rust, then sand with 80-grit sandpaper until all rust is gone and bare metal is visible. For heavy rust or pitted surfaces, use a wire wheel on an angle grinder or drill for faster removal, followed by hand sanding to smooth the surface. Chemical rust removers containing phosphoric acid work well for complex shapes or hard-to-reach areas—apply according to manufacturer directions, let sit for the specified time, then scrub and rinse thoroughly. After rust removal by any method, immediately sand the entire surface with 120-grit then 220-grit sandpaper to create uniform texture, and prime within 2 hours to prevent new rust formation.
Do you need to sand between coats of paint on metal?
Sanding between coats is optional for basic projects but essential for high-quality, professional-looking finishes. For functional items where appearance isn't critical, you can skip inter-coat sanding and simply apply multiple coats following manufacturer-recommended recoat times. However, for furniture, decorative pieces, or any project where smooth appearance matters, sand between coats using 320-400 grit sandpaper to remove dust nibs, orange peel texture, and minor imperfections. Sand primer coats more aggressively to create perfectly smooth bases for topcoats, but use ultra-light pressure with 400-600 grit when sanding base coats or intermediate topcoats. Always remove all sanding dust before applying the next coat, and never sand the final topcoat unless you plan to apply additional coats afterward.
Can you sand galvanized metal before painting?
Yes, but use only 180-220 grit sandpaper with very light pressure to dull the surface without removing the protective zinc coating. Galvanized steel's zinc layer is only 1-3 mils thick and sands off easily with aggressive techniques. The goal is surface dulling, not material removal—sand just enough to eliminate the shiny, smooth surface and create slight texture for paint adhesion. Many professionals prefer chemical etching with white vinegar or commercial galvanized metal primers rather than mechanical sanding, as these methods prepare the surface without risking zinc coating removal. If you sand through to bare steel (visible as darker gray areas), the metal will rust rapidly and lose the galvanizing benefit. For heavily weathered galvanized metal with white rust buildup, wire brush to remove loose material, then sand lightly with 220-grit before priming with specialized galvanized metal primer.
Conclusion
Mastering the art of sanding metal for painting transforms ordinary DIY projects into professional-quality results that last for years. The techniques, grit progressions, and methods covered in this guide provide everything you need to properly prepare any metal surface for paint. From understanding why sanding is essential to executing proper dust removal, each step builds toward the ultimate goal: paint that bonds permanently to metal and withstands environmental stress without premature failure.
Remember that surface preparation accounts for 60-70% of total project time but determines 90% of the outcome. Rushing through sanding to get to the gratifying painting stage virtually guarantees disappointment down the road. Invest time in proper technique, use appropriate grits in correct sequence, and maintain cleanliness throughout the process. The difference between paint that lasts 2 years and paint that lasts 10 years lies almost entirely in preparation quality.
Different metals require adjusted approaches—aggressive techniques that work perfectly on steel can damage aluminum or remove galvanized coatings. Power sanders dramatically improve efficiency on large surfaces, but hand sanding provides the control necessary for edges, details, and final smoothing. Wet sanding between coats elevates good finishes to exceptional ones, though it requires patience and proper timing. Each decision you make during the sanding process impacts final results.
The most common mistakes—skipping grit levels, inadequate dust removal, inconsistent pressure, and delayed priming—are all easily avoided with awareness and discipline. Create a preparation checklist for your projects, follow proven grit progressions, and never compromise on cleaning. These simple practices separate successful projects from frustrating failures that require complete do-overs.
For comprehensive guidance on all aspects of metal painting projects, including primer selection, application techniques, and topcoat options, explore our Painting Metal Surfaces: Techniques and Best Practices resource. With proper sanding technique as your foundation, you're equipped to tackle any metal painting project with confidence and achieve results that look professional and last for years.